
Behind the Shot
The Cameras, Techniques and Technology Behind My Photography
Photography is ultimately about the image—not the equipment used to create it.
But what happens behind that image can be remarkably different from one photograph to another.
Photographing an eagle diving toward the water may require a long telephoto lens, a shutter speed measured in thousandths of a second, continuous autofocus and the ability to follow an unpredictable subject through the viewfinder.
Photographing a nighttime cityscape can require almost exactly the opposite: a much shorter lens, a tripod, very low ISO and an exposure lasting 30 seconds.
And sometimes the most important part of making a photograph happens before I ever press the shutter.
Wildlife photography can involve researching where and when a particular species is likely to appear, followed by a considerable amount of waiting. Photographing figure skating can require knowing where the most important elements of a routine will occur and being positioned correctly before they happen. Portrait photography presents another challenge entirely, because instead of responding to existing conditions, I may have the opportunity to create the lighting and environment myself.
The camera matters. So do the lenses, lighting and software.
But equipment is only one part of what happens behind the shot.
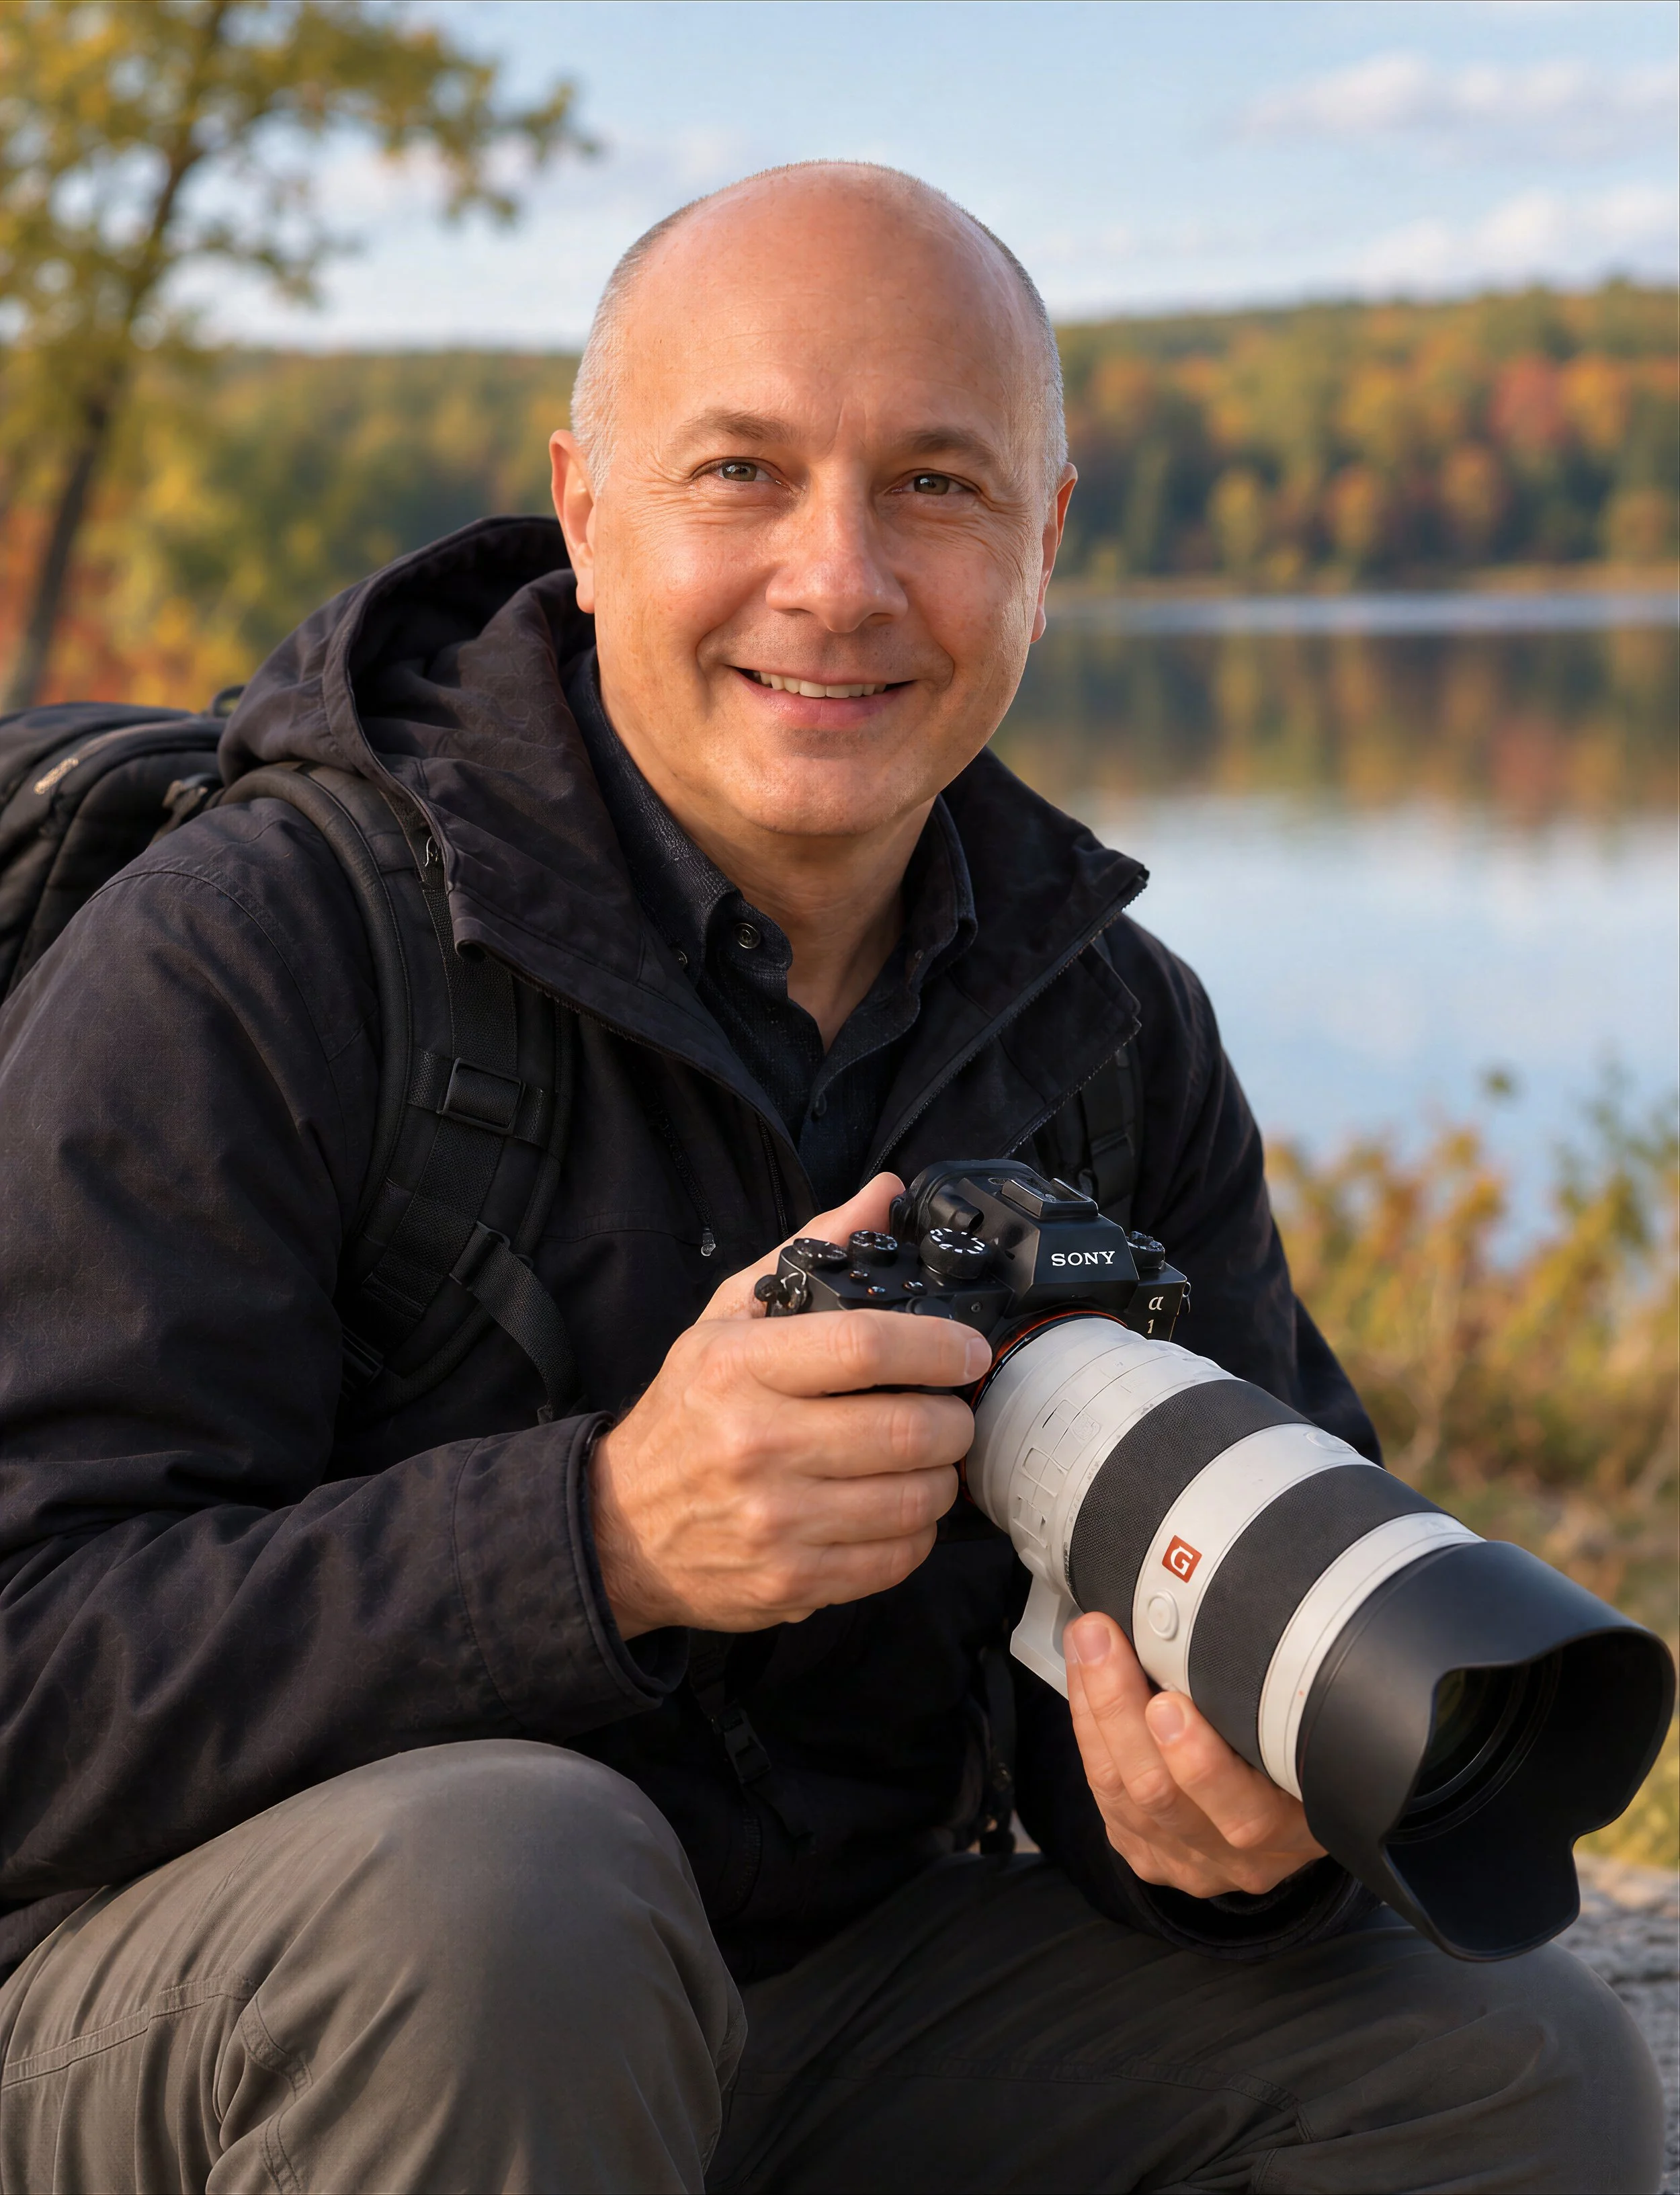
The Tools Behind the Shot
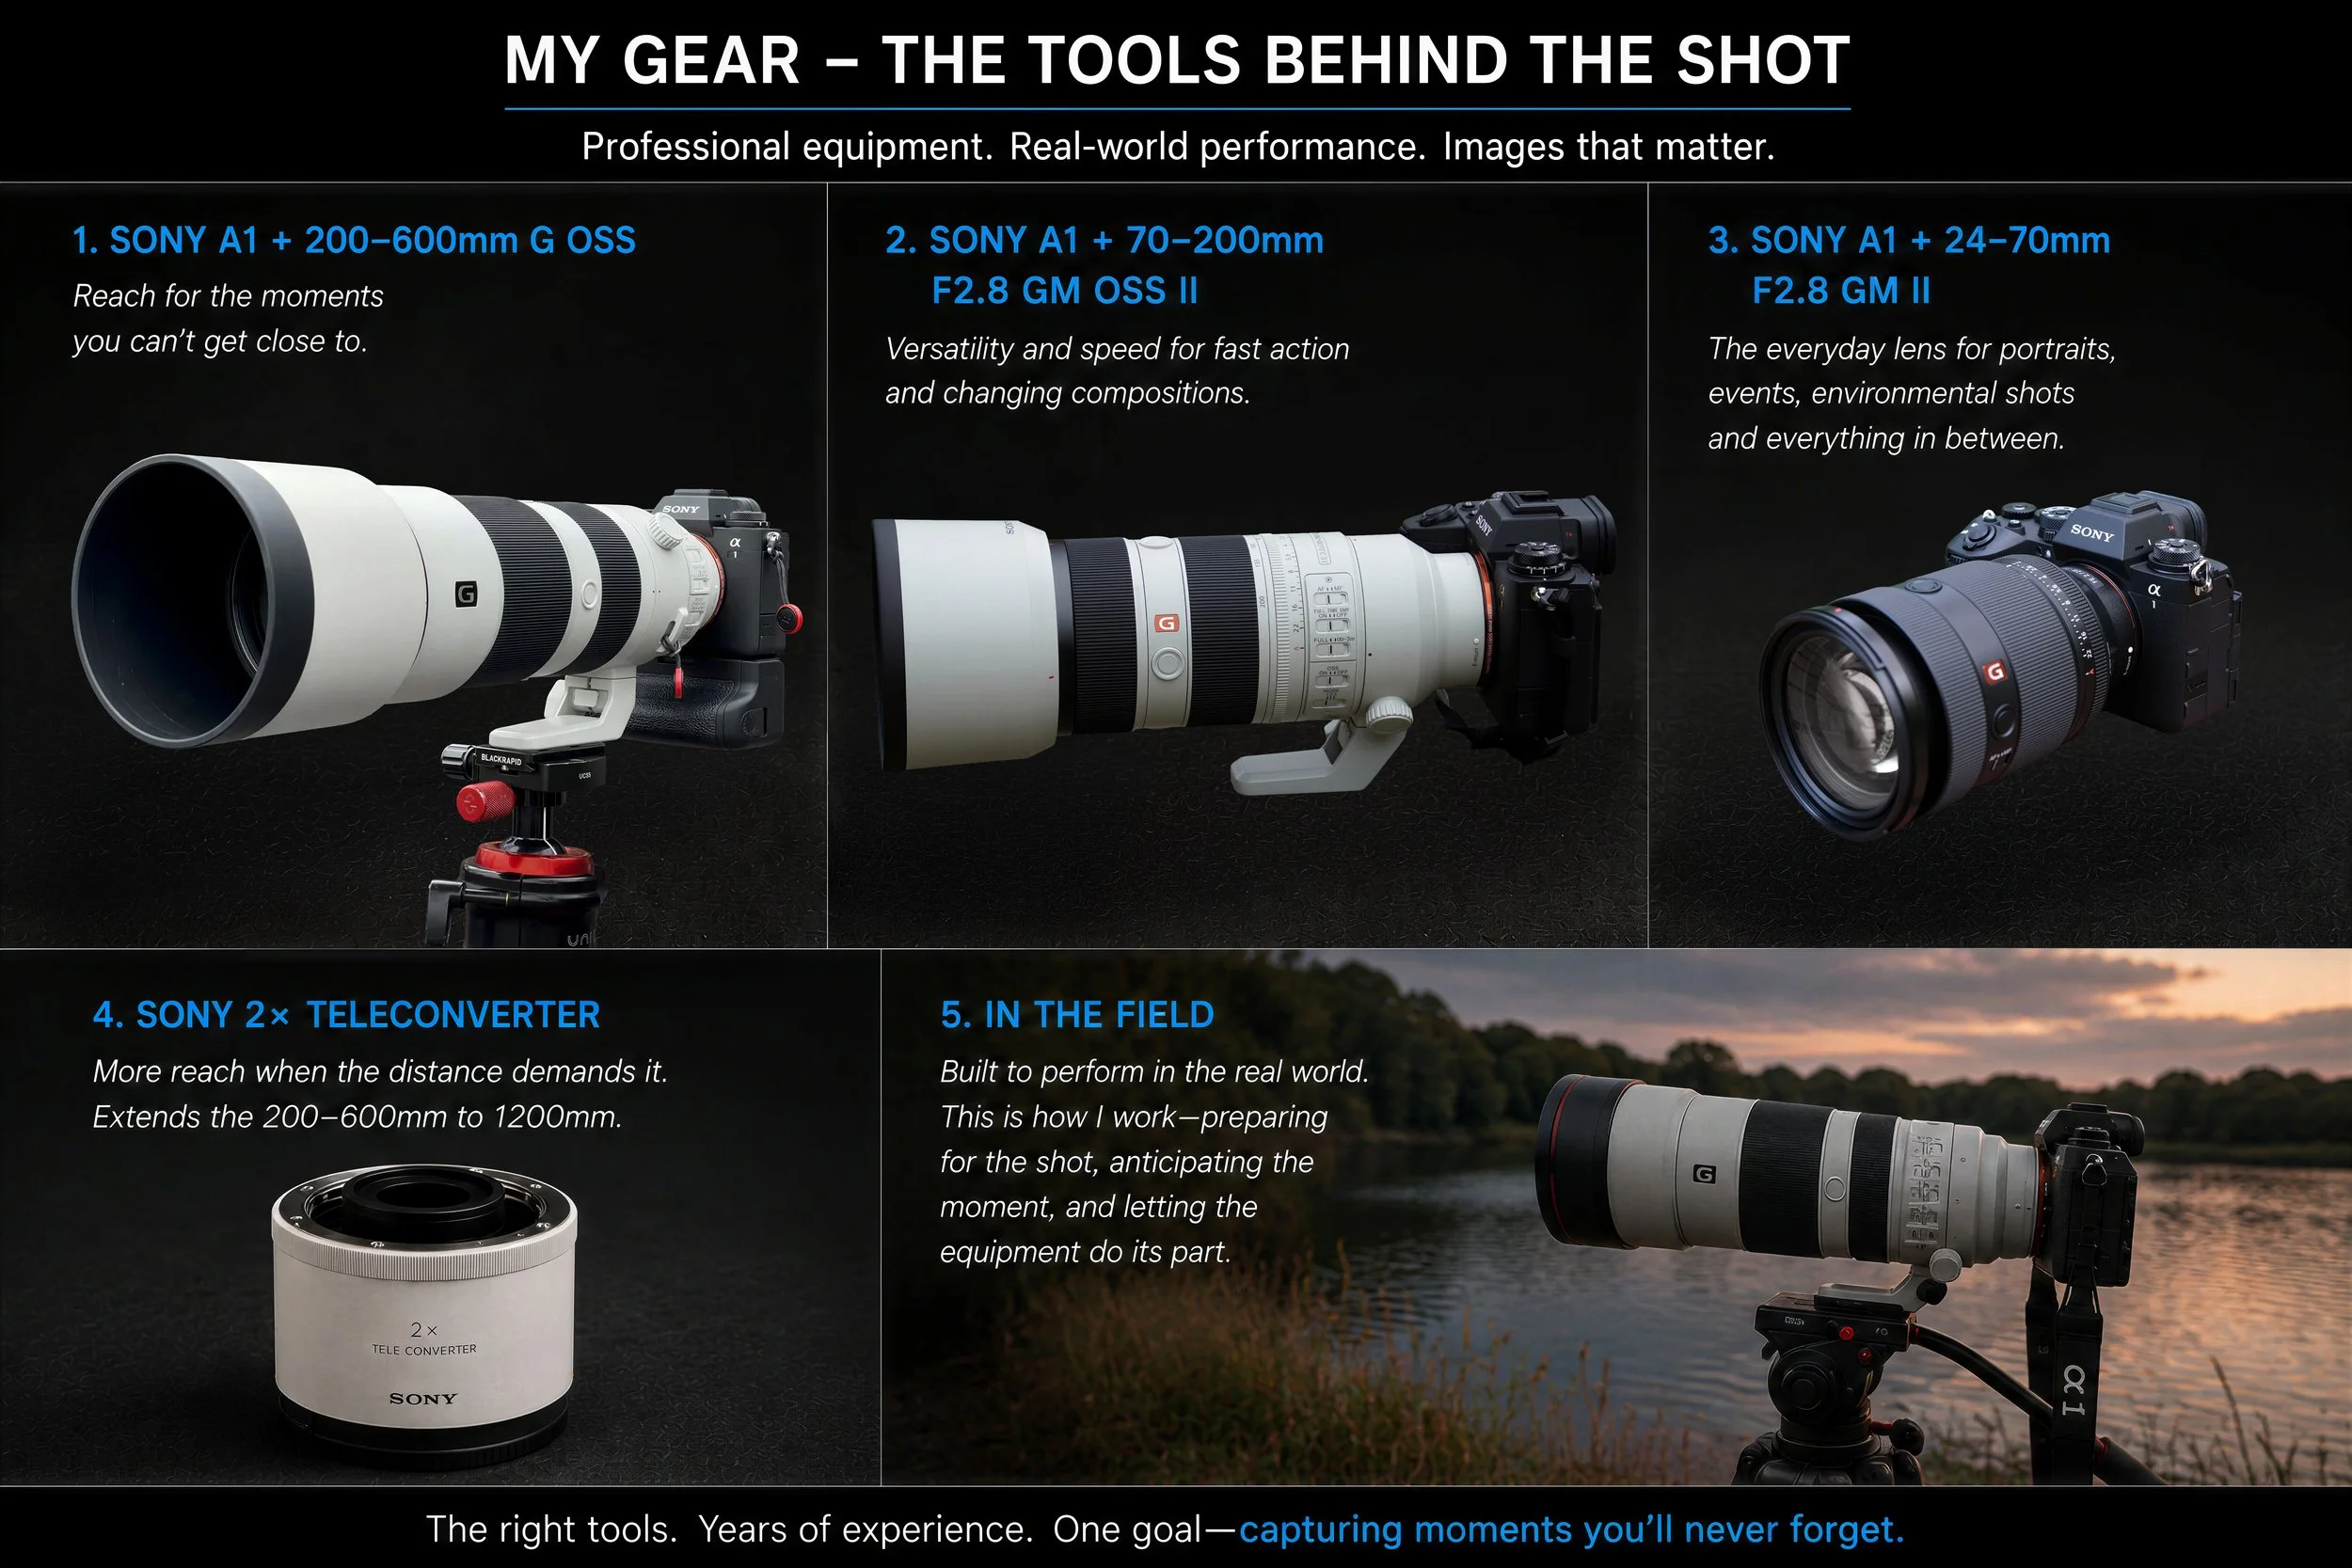
At the center of most of my photography is the Sony Alpha 1.
Its combination of high resolution, sophisticated autofocus and subject tracking, and extremely fast continuous shooting makes it well suited to the wide variety of subjects I photograph.
My choice of lens changes considerably depending upon the situation.
The Sony FE 200–600mm f/5.6–6.3 G OSS gives me the reach I need for wildlife and distant subjects. The Sony FE 70–200mm f/2.8 GM OSS II combines speed, reach and rapidly adjustable framing for figure skating, sports and live performance. The Sony FE 24–70mm f/2.8 GM II is useful for portraits, events, landscapes and situations where I need a wider field of view.
When additional reach is necessary, I can also pair the 200–600mm with a Sony 2× teleconverter, extending the available focal length to as much as 1200mm.
That extra reach comes with compromises—particularly a reduction in available light—but there are situations in wildlife photography where getting physically closer simply isn't possible or appropriate.
Having different tools isn't about carrying more equipment.
It's about selecting the right tool for the photograph I'm trying to make.
Wildlife Photography
Research, Patience and Fractions of a Second
Wildlife photography can appear deceptively spontaneous.
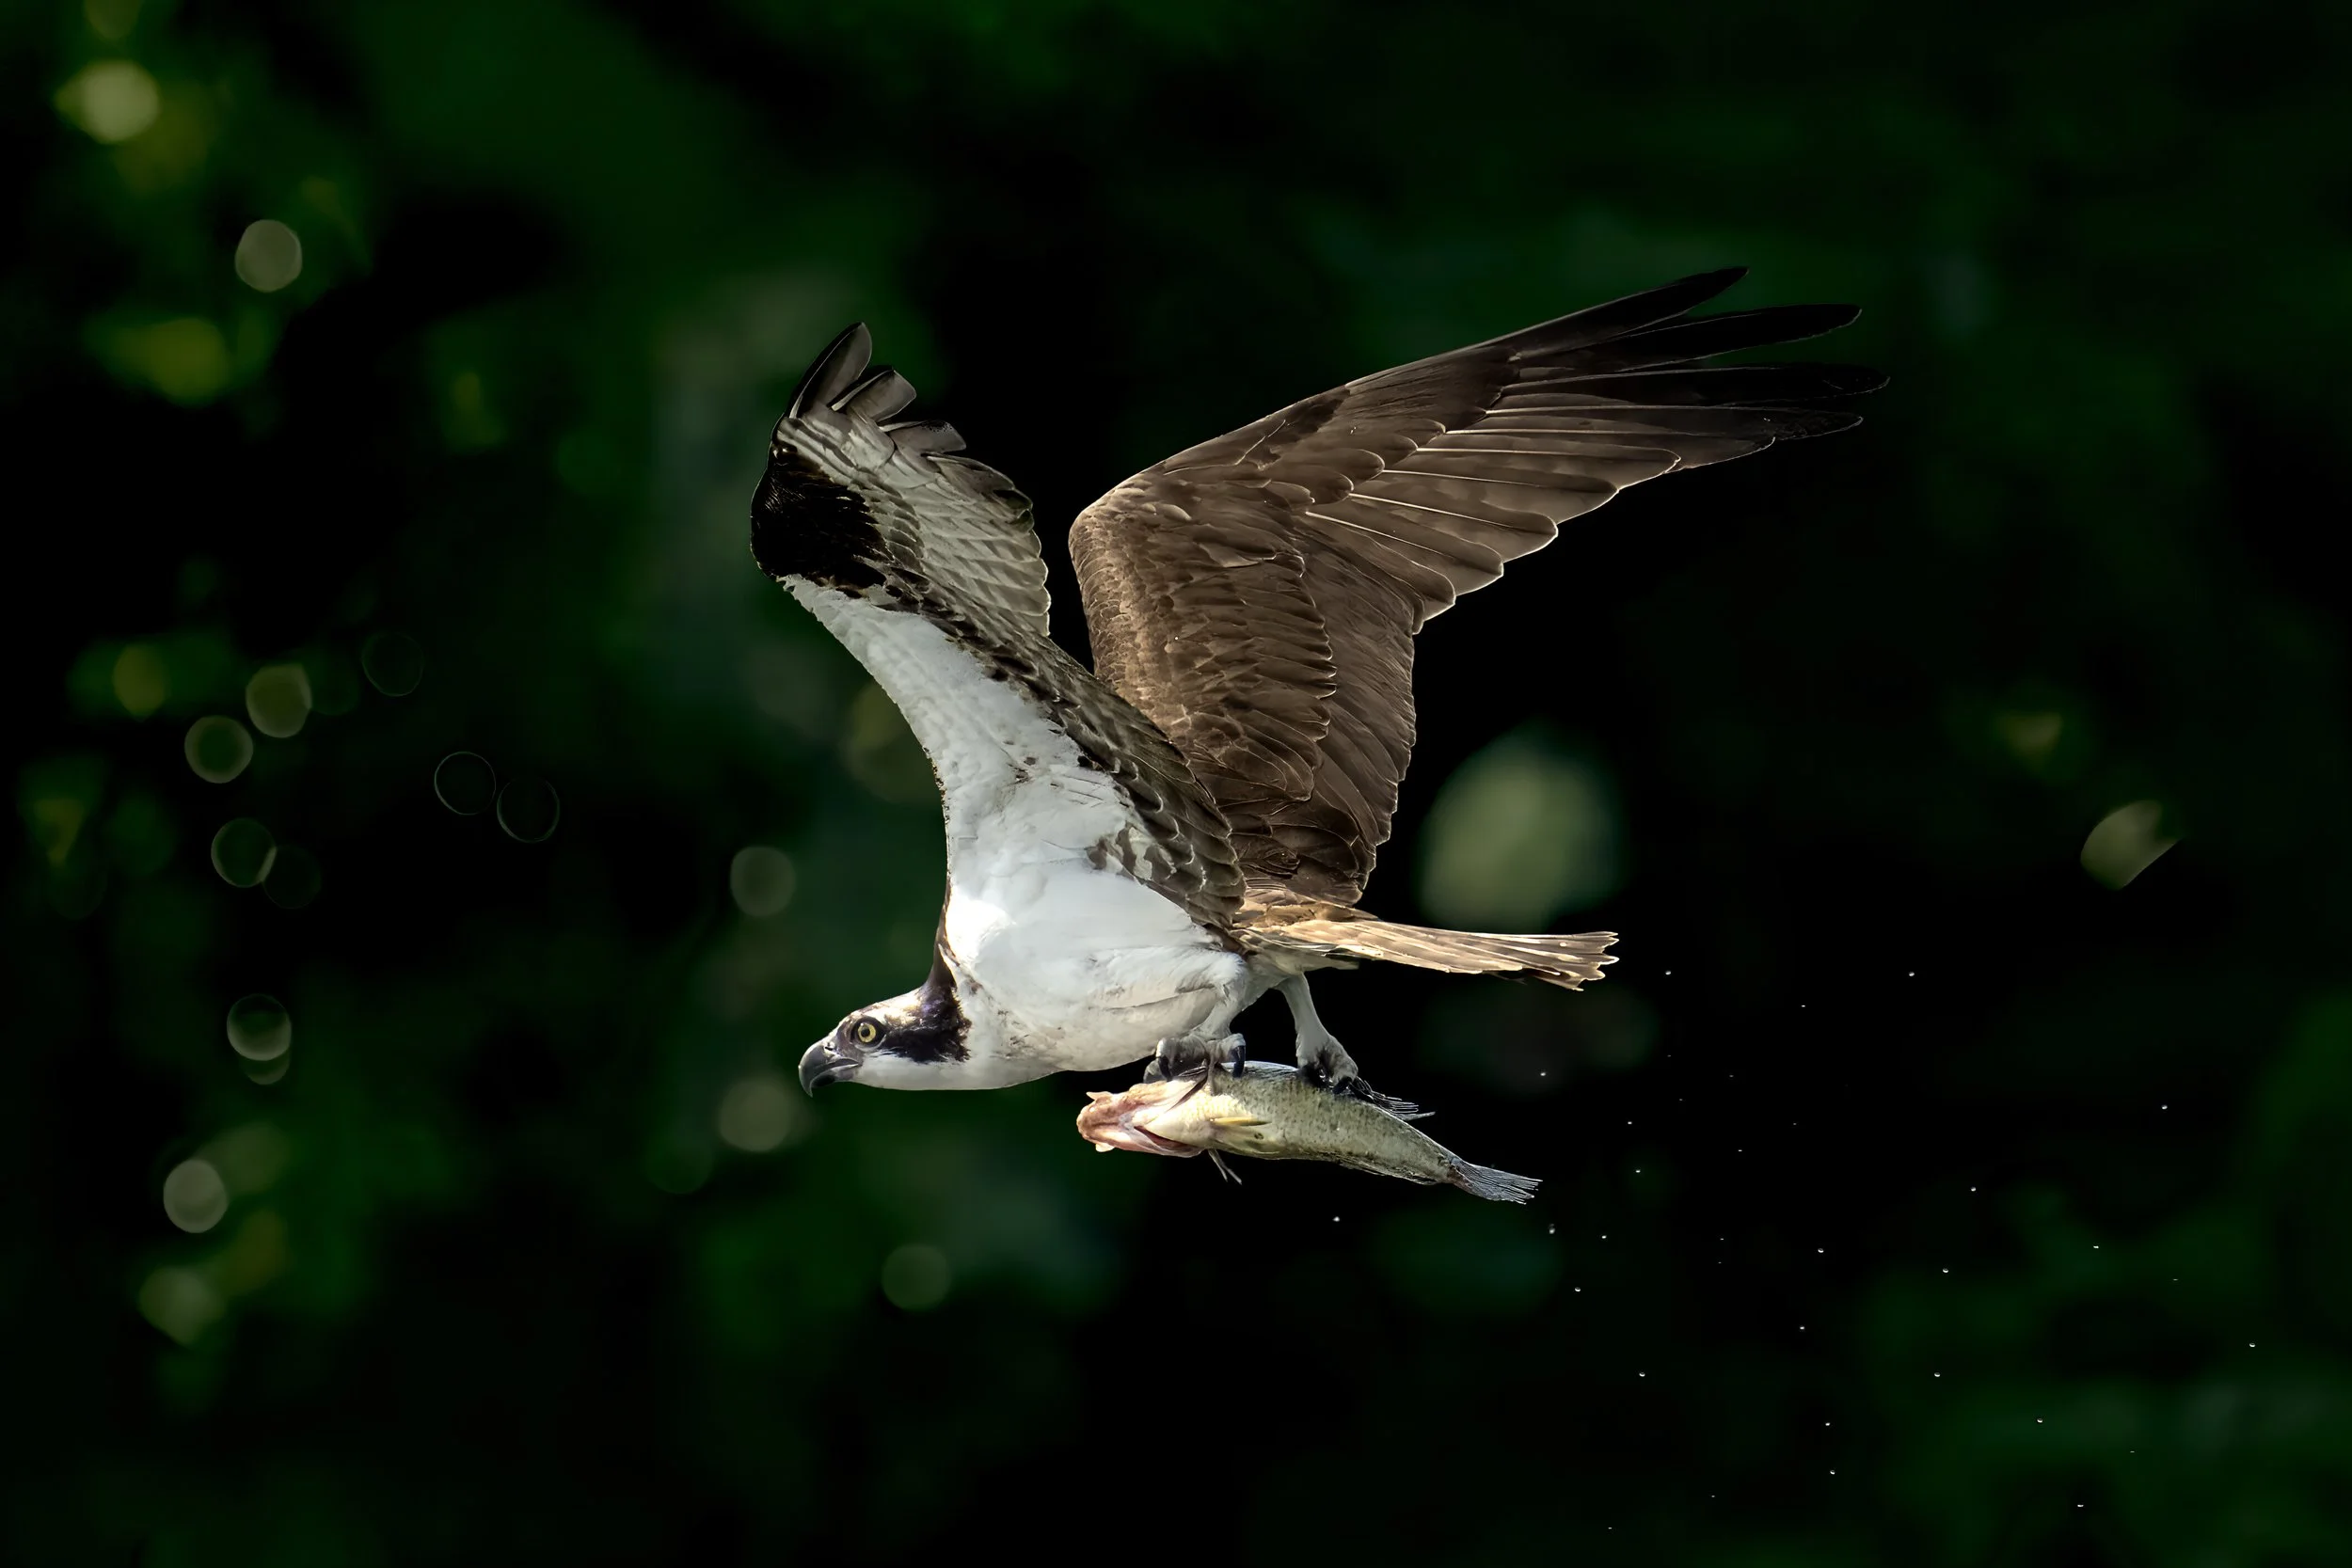
An eagle drops toward the water. A bluebird launches into flight. An osprey suddenly appears carrying a fish.
The photograph may record only a fraction of a second, but getting into position to capture that fraction of a second can take considerably longer.
Finding wildlife requires more than a long lens. It can involve knowing where a particular species is likely to be found, understanding its habitat and behavior, choosing an appropriate location and then waiting without disturbing the subject.
Bald Eagles are a good example. They are commonly found near lakes and rivers throughout much of the United States, and their population has rebounded impressively in recent decades. Yet most people probably pass by eagles far more often than they realize. Wildlife photographers learn where to look—and what to look for.
Once you begin recognizing their preferred habitat, perching locations and behavior, finding an eagle isn't necessarily the difficult part. Turning that encounter into a memorable photograph is.
That requires a very different kind of preparation: approaching without disturbing the bird, remaining quiet and unobtrusive, watching its behavior, anticipating what it might do next, and being ready when something happens. An eagle may sit almost motionless for a long time and then suddenly launch from its perch, interact with another bird or dive toward the water for a fish. The transition from waiting patiently to reacting quickly can happen in seconds.
That's one of the things I enjoy most about wildlife photography—the photograph may capture only a fraction of a second, but getting that fraction of a second often requires considerably more time, patience and preparation.
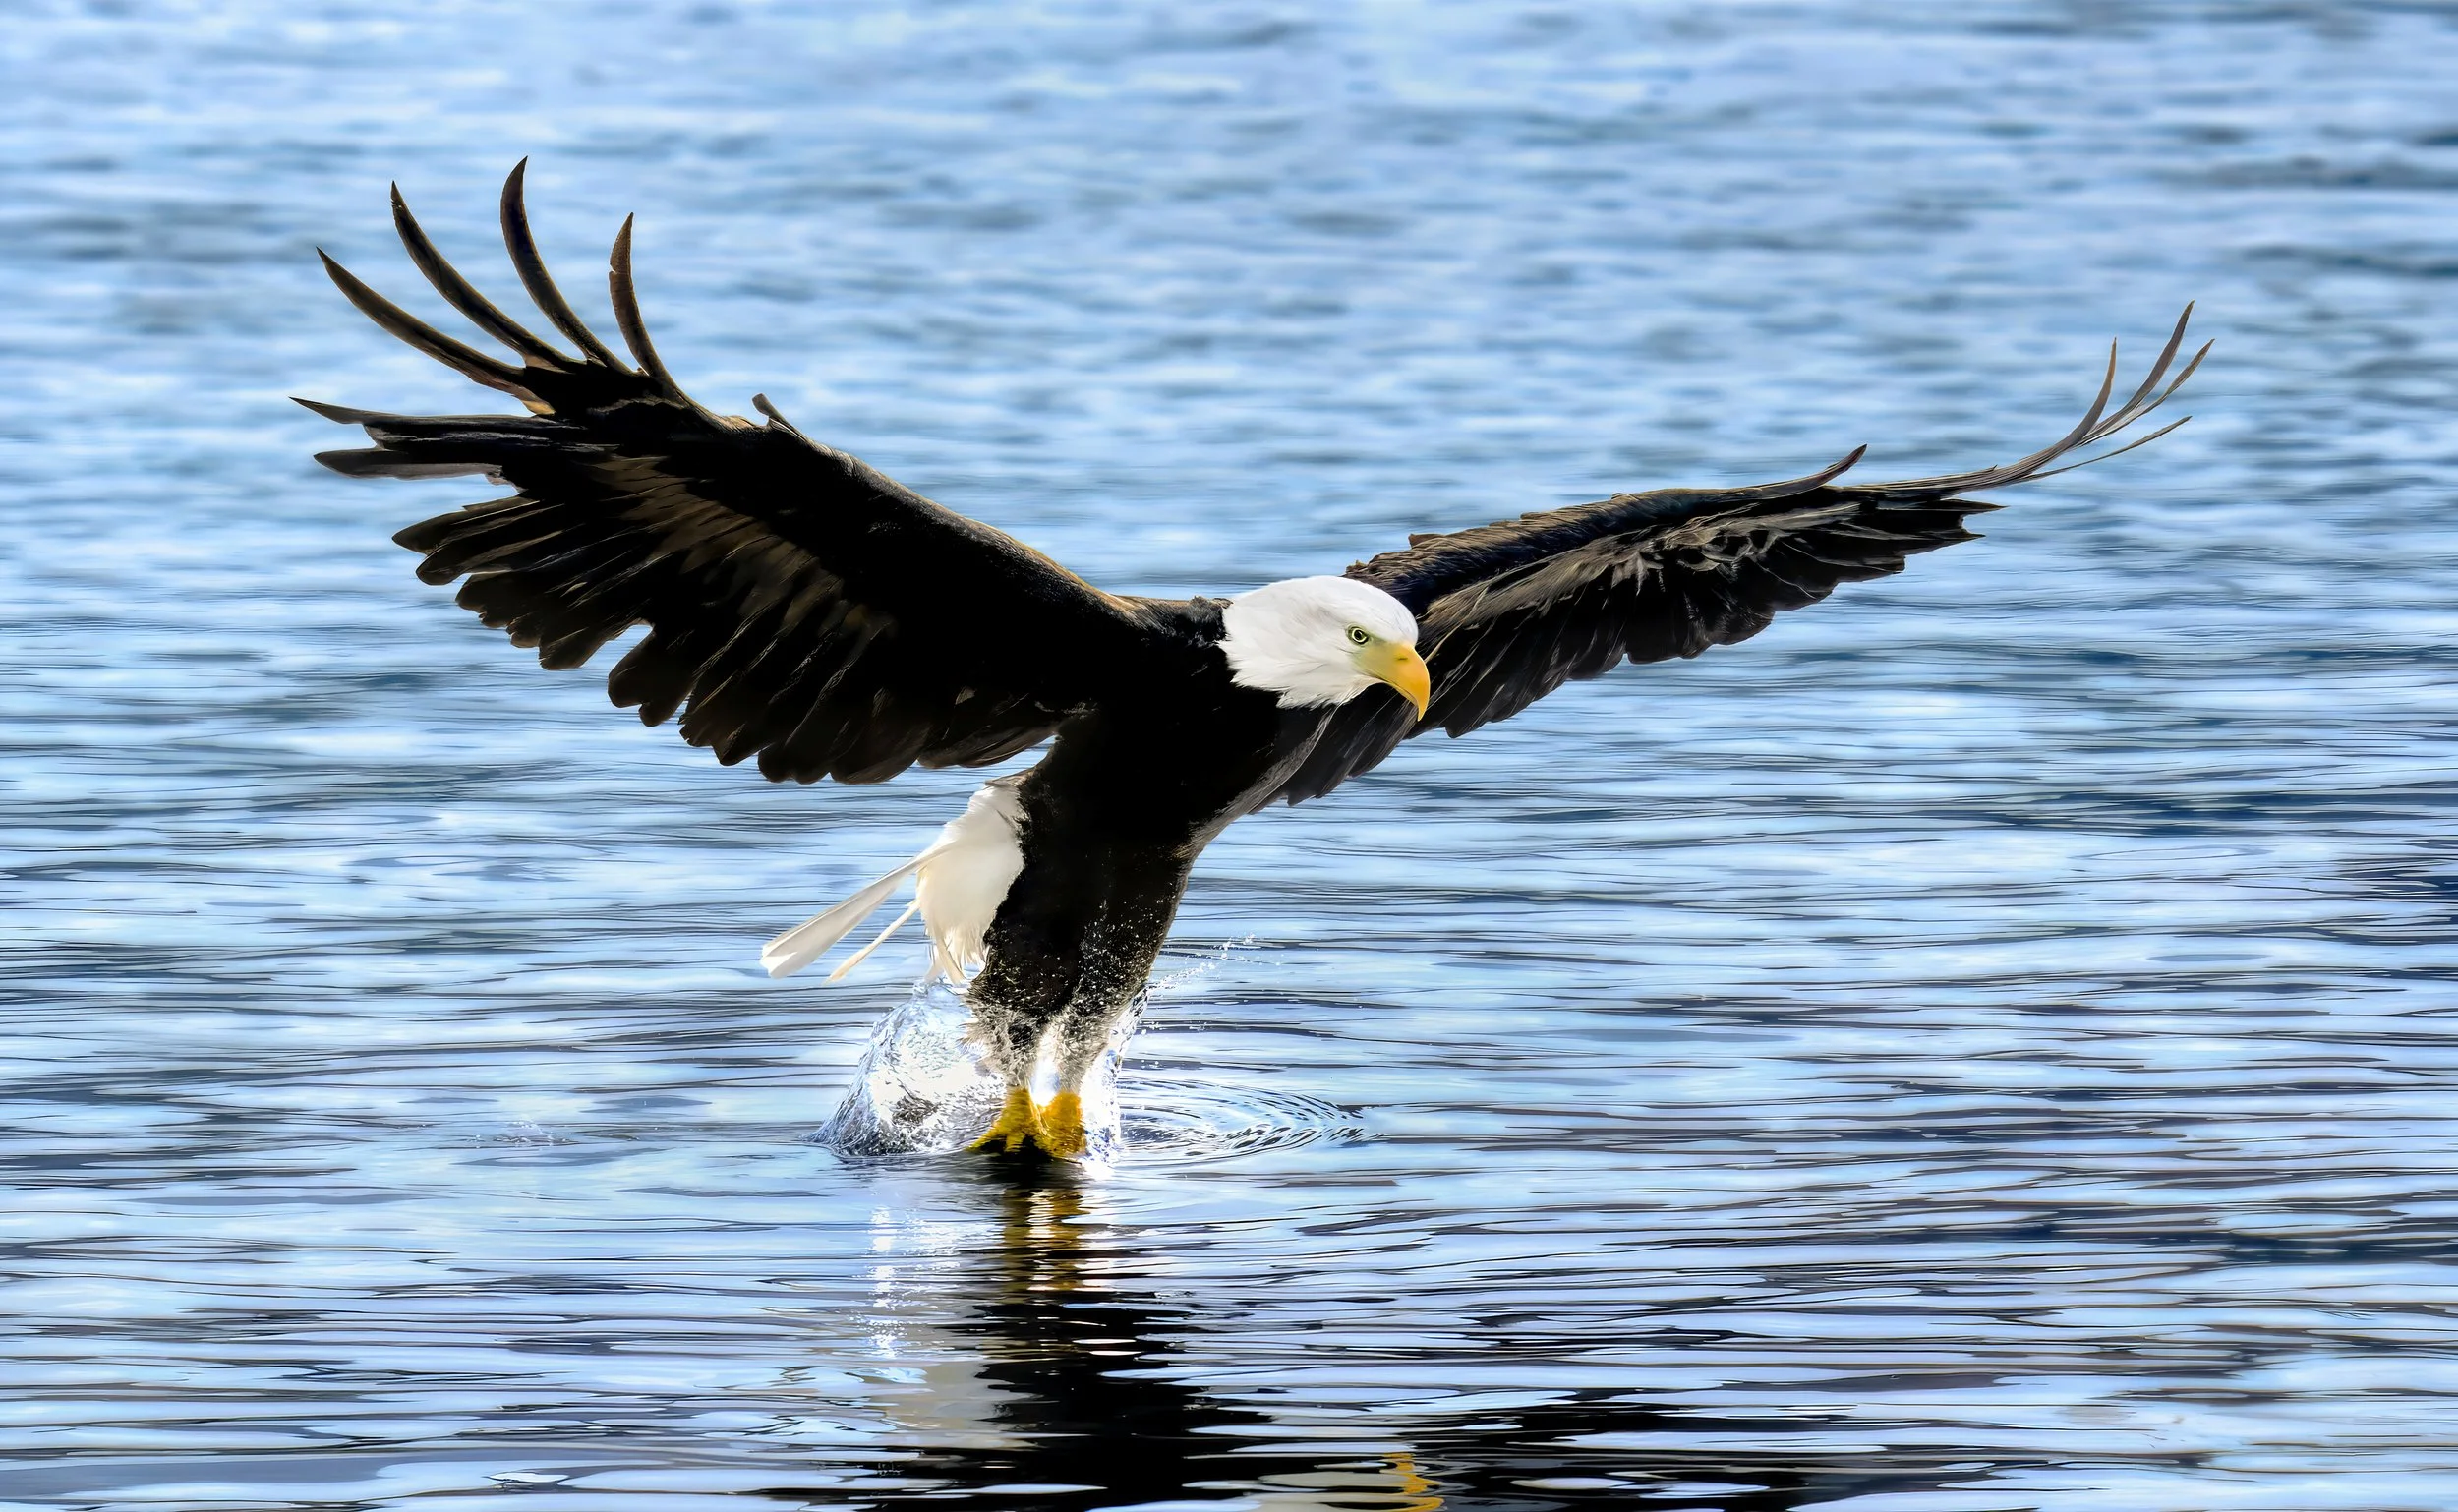
Breaking the Surface
For the eagle photograph above, I used the Sony A1 with the 200–600mm lens and 2× teleconverter.
Behind This Shot
Sony A1 • FE 200–600mm G OSS + 2X TC • 694mm • 1/2500 sec • f/13 • ISO 1600 • Continuous AF • Eye Tracking • Handheld
A shutter speed of 1/2500 second helps freeze extremely fast movement. Continuous autofocus and eye tracking help the camera maintain focus as the bird moves toward the water.
But none of those settings tells me when the eagle is about to strike.
The camera can help follow the subject and record a rapid sequence of frames.
Anticipating when that sequence should begin is still the photographer's responsibility.
Small Subjects, Big Challenge
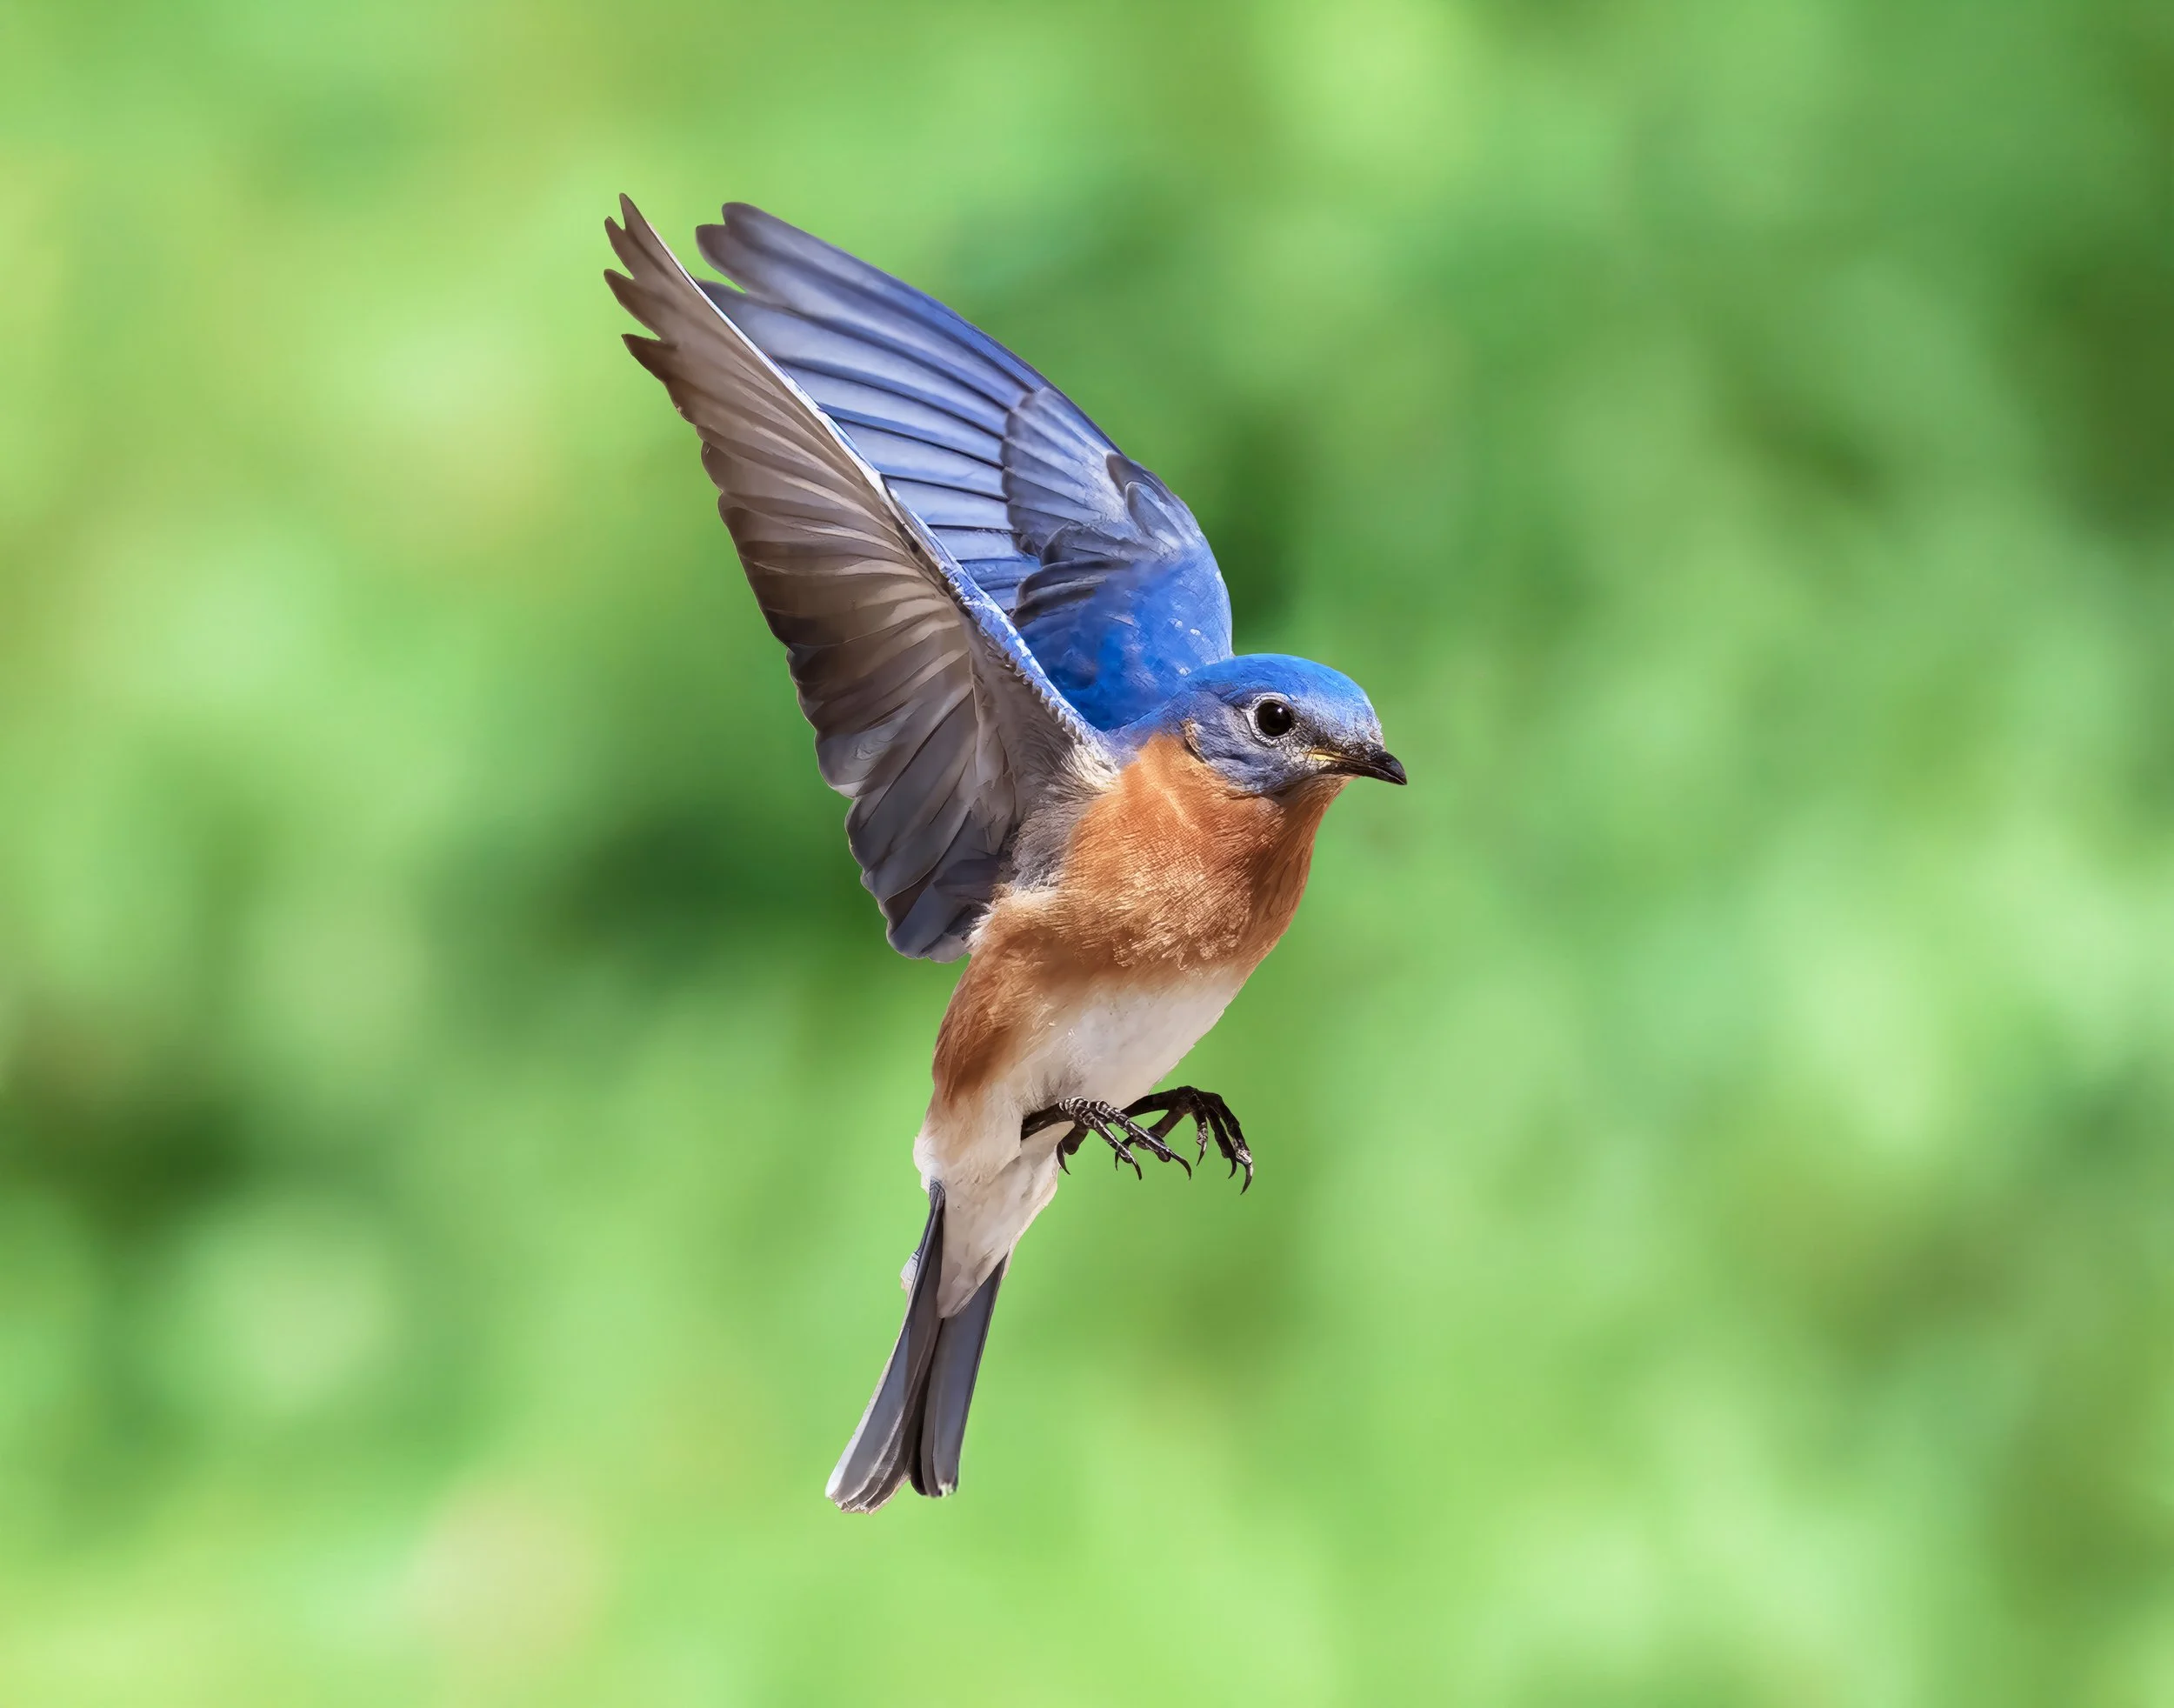
A small bird in flight can actually present a greater tracking challenge than a much larger bird.
At long focal lengths, the field of view becomes very narrow. I first have to locate the bird through the lens, acquire focus and then follow it smoothly while trying to maintain a useful composition.
For the bluebird image:
Sony A1 • FE 200–600mm G OSS • 415mm • 1/800 sec • f/8 • ISO 320
The osprey required considerably more reach:
Sony A1 • FE 200–600mm G OSS + 2× TC • 1200mm • 1/2000 sec • f/13 • ISO 2000 • Continuous AF • Eye Tracking • Handheld
At 1200mm, finding and tracking a moving bird becomes a significant part of the photographic technique itself.
Wildlife Portraits
When Speed Gives Way to Detail
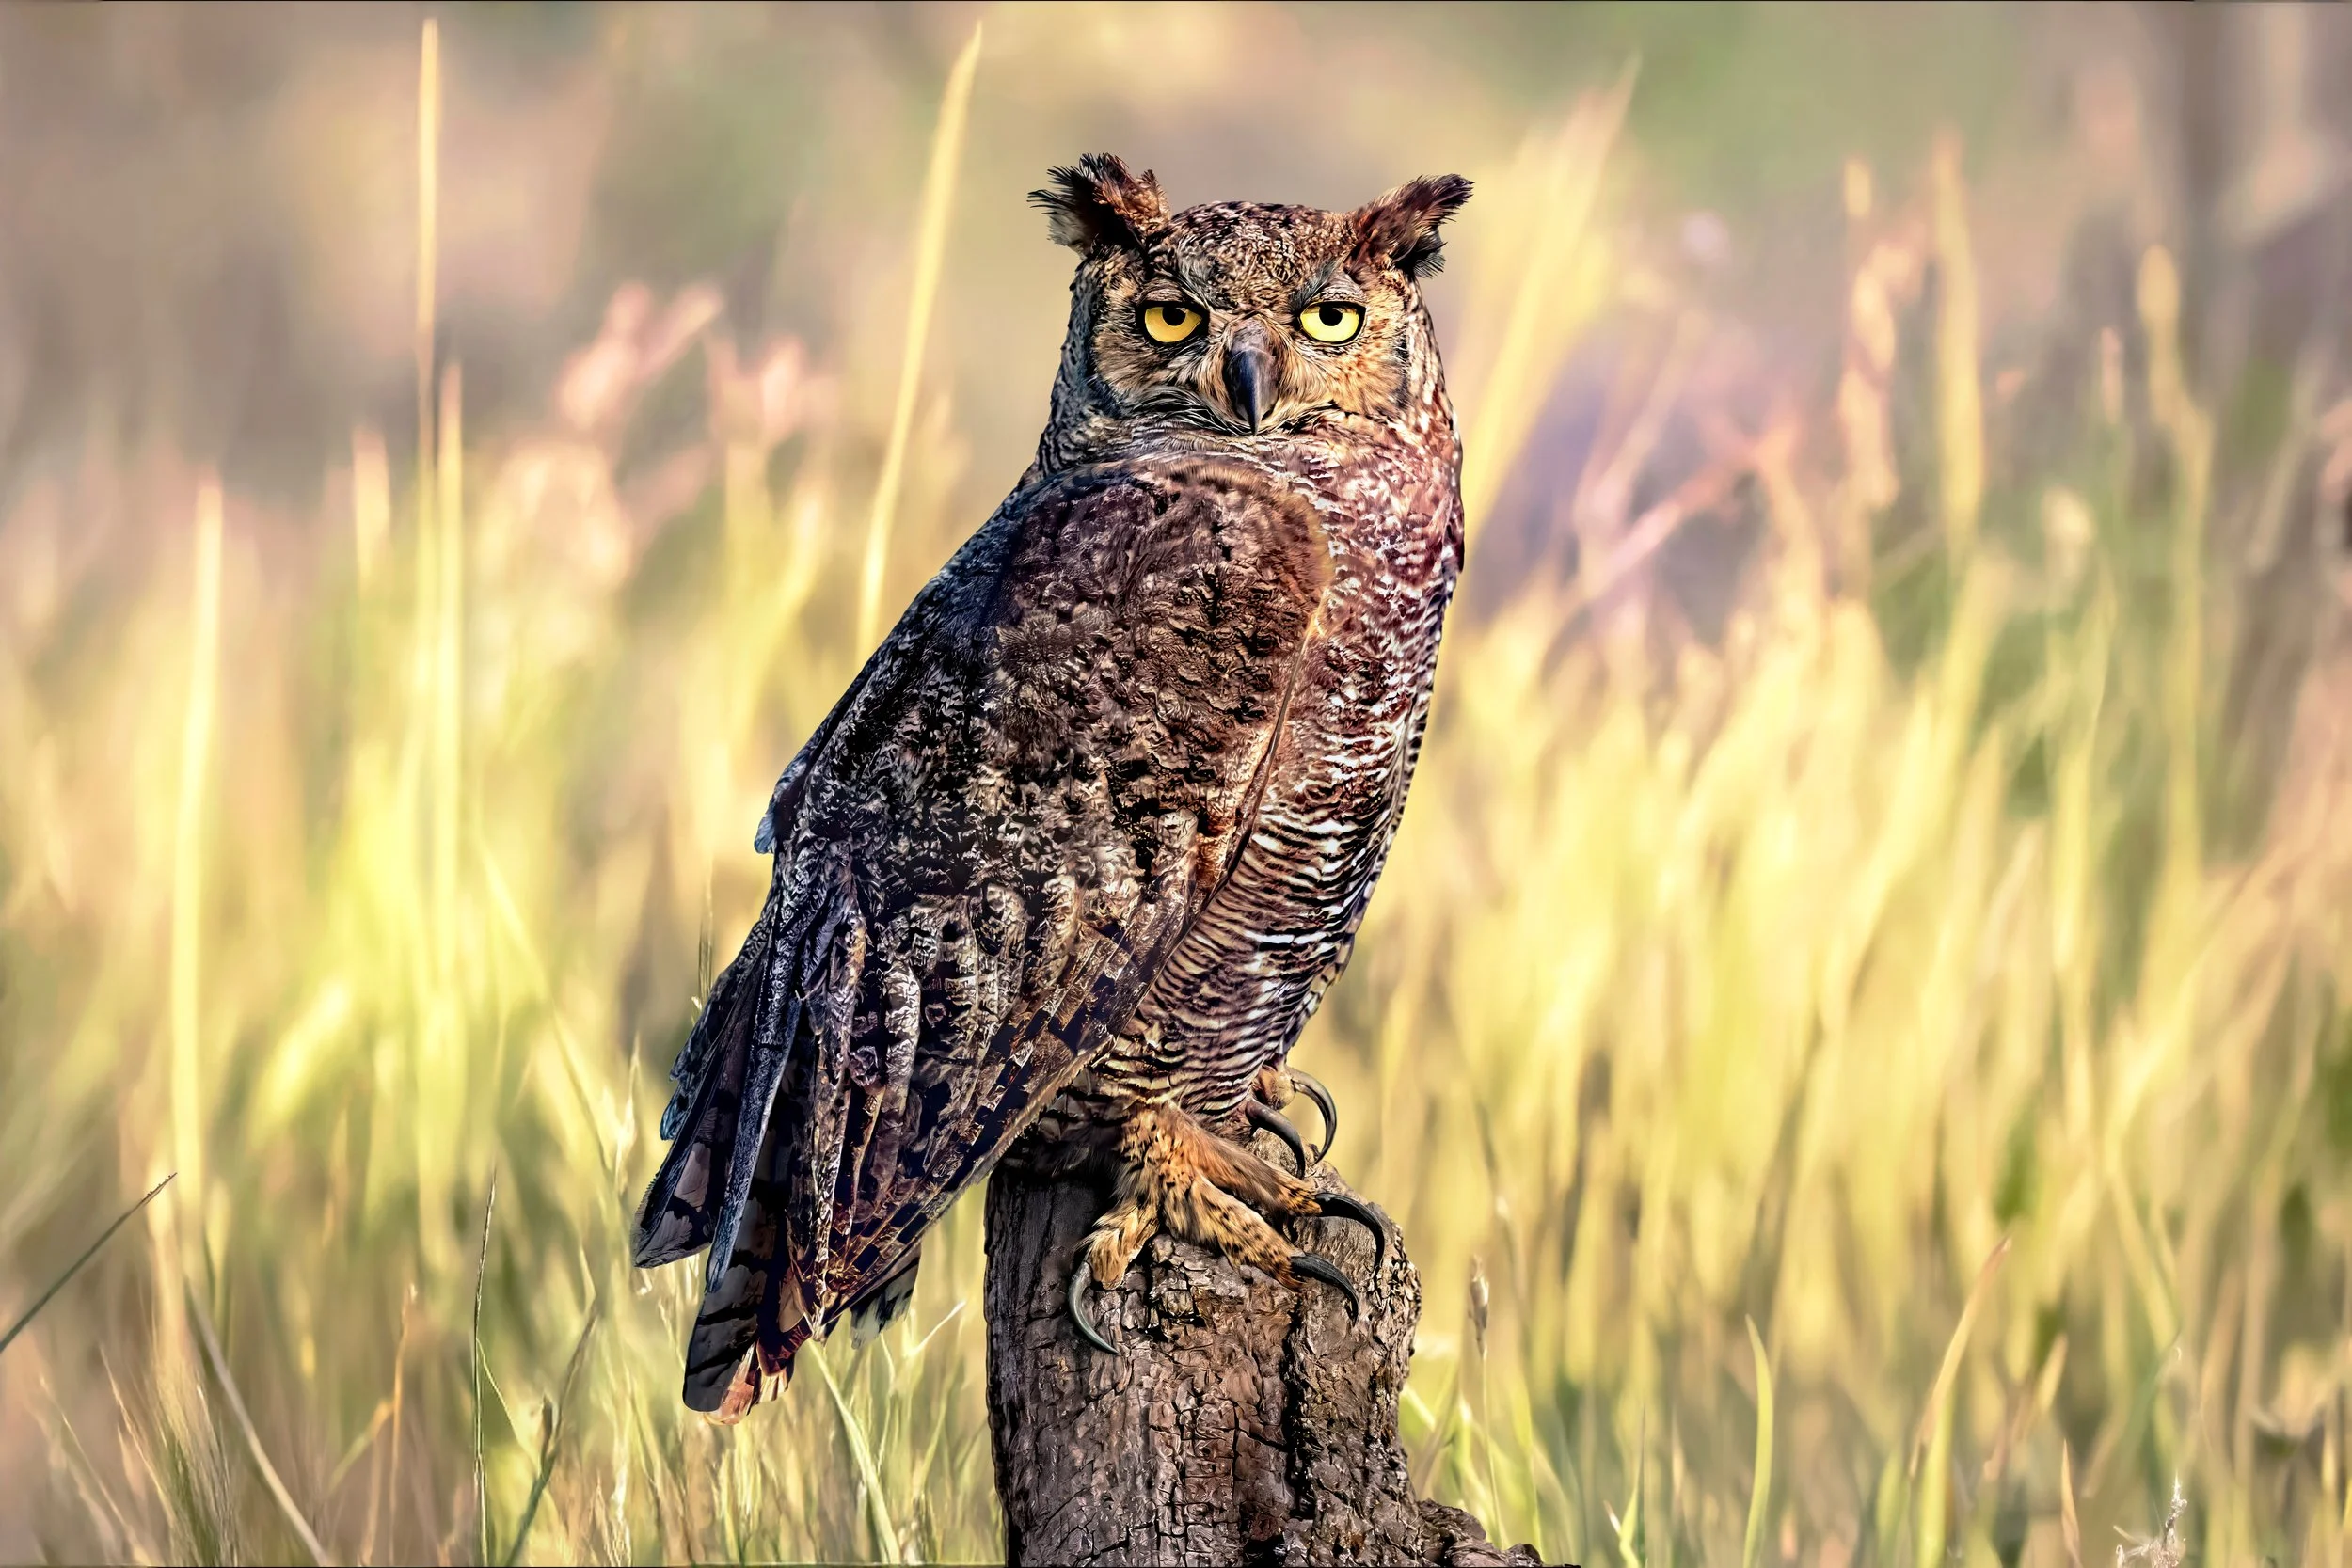
Not every wildlife photograph is about high-speed action.
A perched owl or resting bird presents a different problem. Instead of concentrating almost entirely on freezing motion, I can pay more attention to the eyes, expression, surrounding branches, background, light and composition.
Sometimes a small movement by the subject—a turn of the head or a moment of eye contact—changes the entire personality of the photograph.
For this owl portrait, I again needed extreme reach:
Sony A1 • FE 200–600mm G OSS + 2× TC • 1200mm • 1/2000 sec • f/13 • ISO 3200 • Continuous AF • Eye Tracking • Handheld
The equipment is similar to what I might use for a bird in flight.
The way I'm using it is different.
This Great Horned Owl seemed completely uninterested in me. Even though I was photographing it from less than 50 yards away, it continued staring straight ahead, seemingly determined not to acknowledge my presence.
After taking numerous photographs with essentially the same pose, I tried a few whistles and calls hoping to get it to turn its head. Eventually, it did—and the expression it gave me was considerably more interesting than the one I had been photographing.
I titled the photograph “Who Me?”
But every time I look at that expression, I can't help thinking the owl was actually saying something more along the lines of:
“Would you just shut the hell up?”
Sometimes wildlife photography is about anticipating dramatic action. Other times, it's simply about waiting for a subject to give you a little personality.
Figure Skating
Knowing Where the Photograph Will Happen
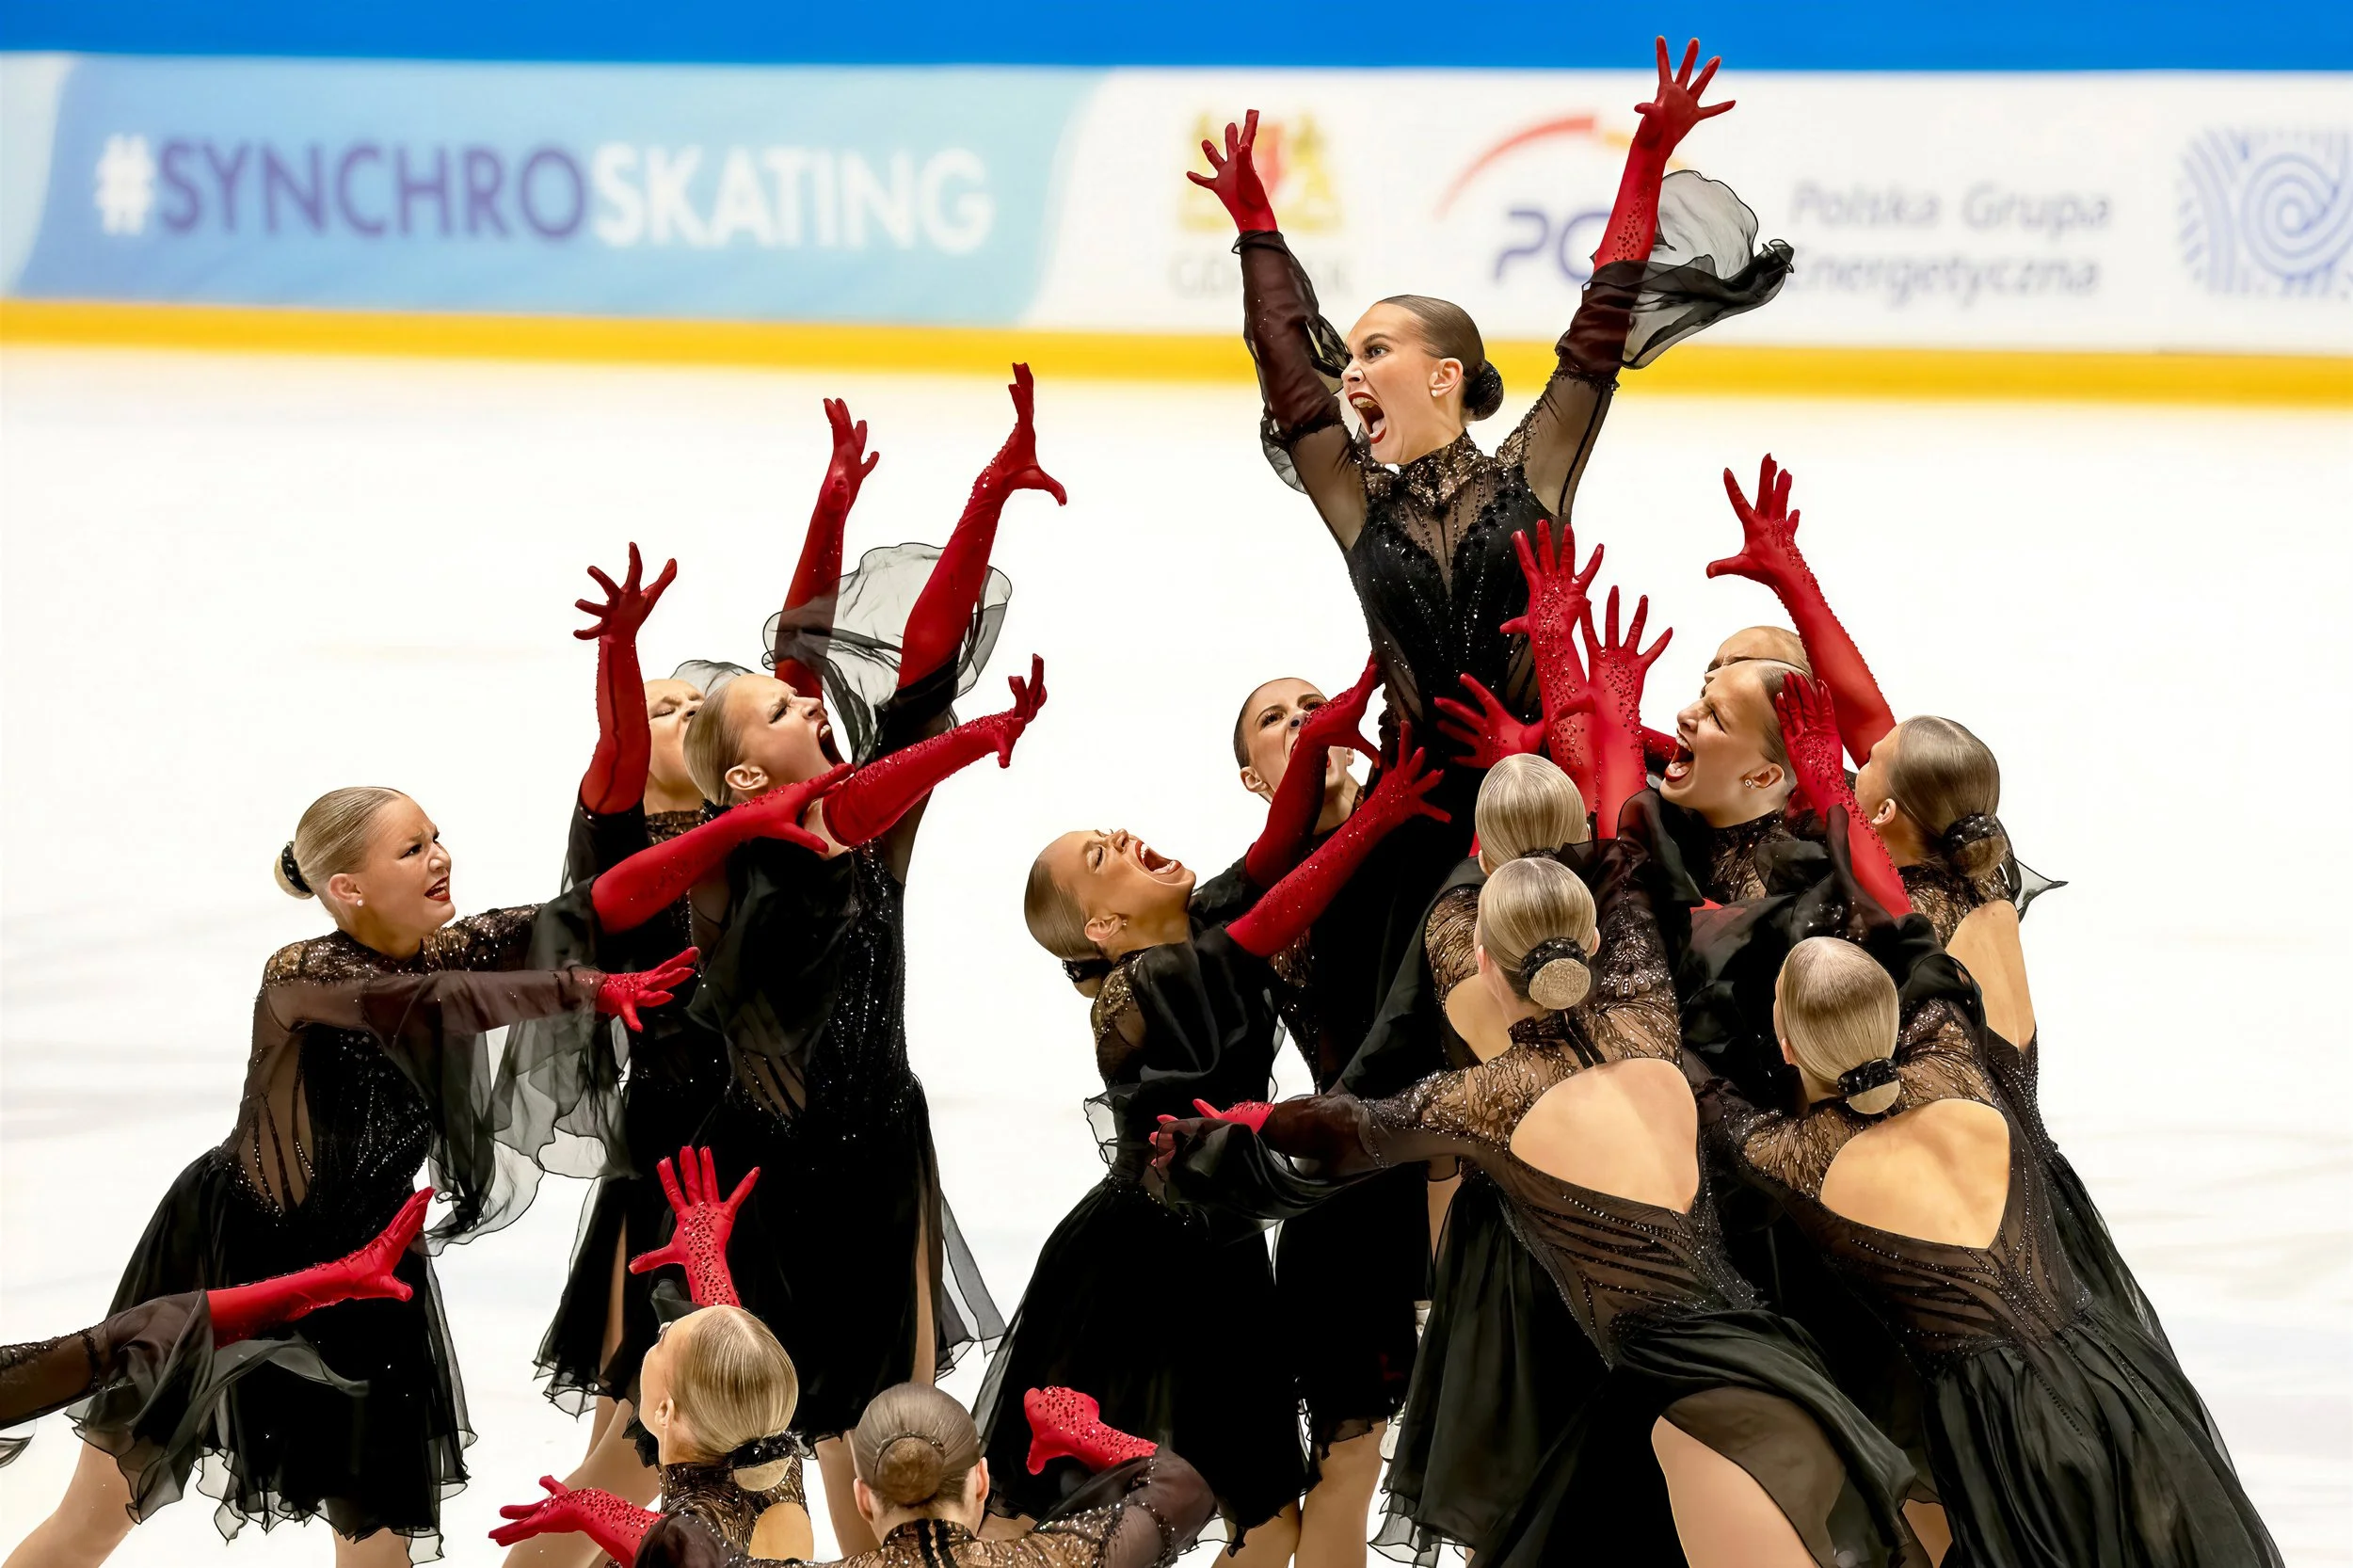
Figure skating requires another completely different approach.
The skaters are moving quickly. Their distance from the camera changes constantly. Multiple athletes may pass through the frame at once, and the element I want to photograph may reach its visual peak for only an instant.
But some of the most important preparation has nothing to do with camera settings.
When possible, knowing the routine allows me to anticipate where an important element will occur and what the skaters will be doing when they reach that part of the ice.
That affects where I want to position myself before the performance begins.
Finding the right position in an ice arena is one of the most important—and sometimes most challenging—parts of photographing figure skating. Where I position myself affects not only how close I can get to the action, but also the angle, background and overall composition of the photograph.
I generally like to include a small amount of the barrier wall because it provides context and helps establish the ice surface, but I try to keep arena seating and spectators to a minimum. Too much of the audience can create a distracting background and take attention away from the skaters.
Positioning becomes even more important when photographing the key elements of a routine. Many of those elements are intentionally presented toward the judges, so knowing the routine—and where those moments will occur—allows me to choose a location that puts me as close as possible to the action while still giving me the angle I want.
Of course, the perfect location isn't useful if a building support, protective barrier or other obstruction ends up between my camera and the skaters. Sometimes moving only a few feet can make the difference between an unobstructed view and missing one of the most important moments of the performance.
By the time a major element begins, I don't want to be searching for the photograph. I want to already be standing where the photograph is going to happen.
For The Moment They Knew:
Sony A1 • FE 70–200mm f/2.8 GM OSS II • 188mm • 1/1250 sec • f/4.5 • ISO 5000 • Continuous AF • Eye Tracking • Handheld
Those settings show one of the compromises inherent in indoor sports photography.
I need enough shutter speed to freeze athletic movement, but arena lighting may require raising ISO considerably to achieve it.
The 70–200mm gives me another important advantage: I can adjust the composition almost instantly as the skaters move toward or away from me.
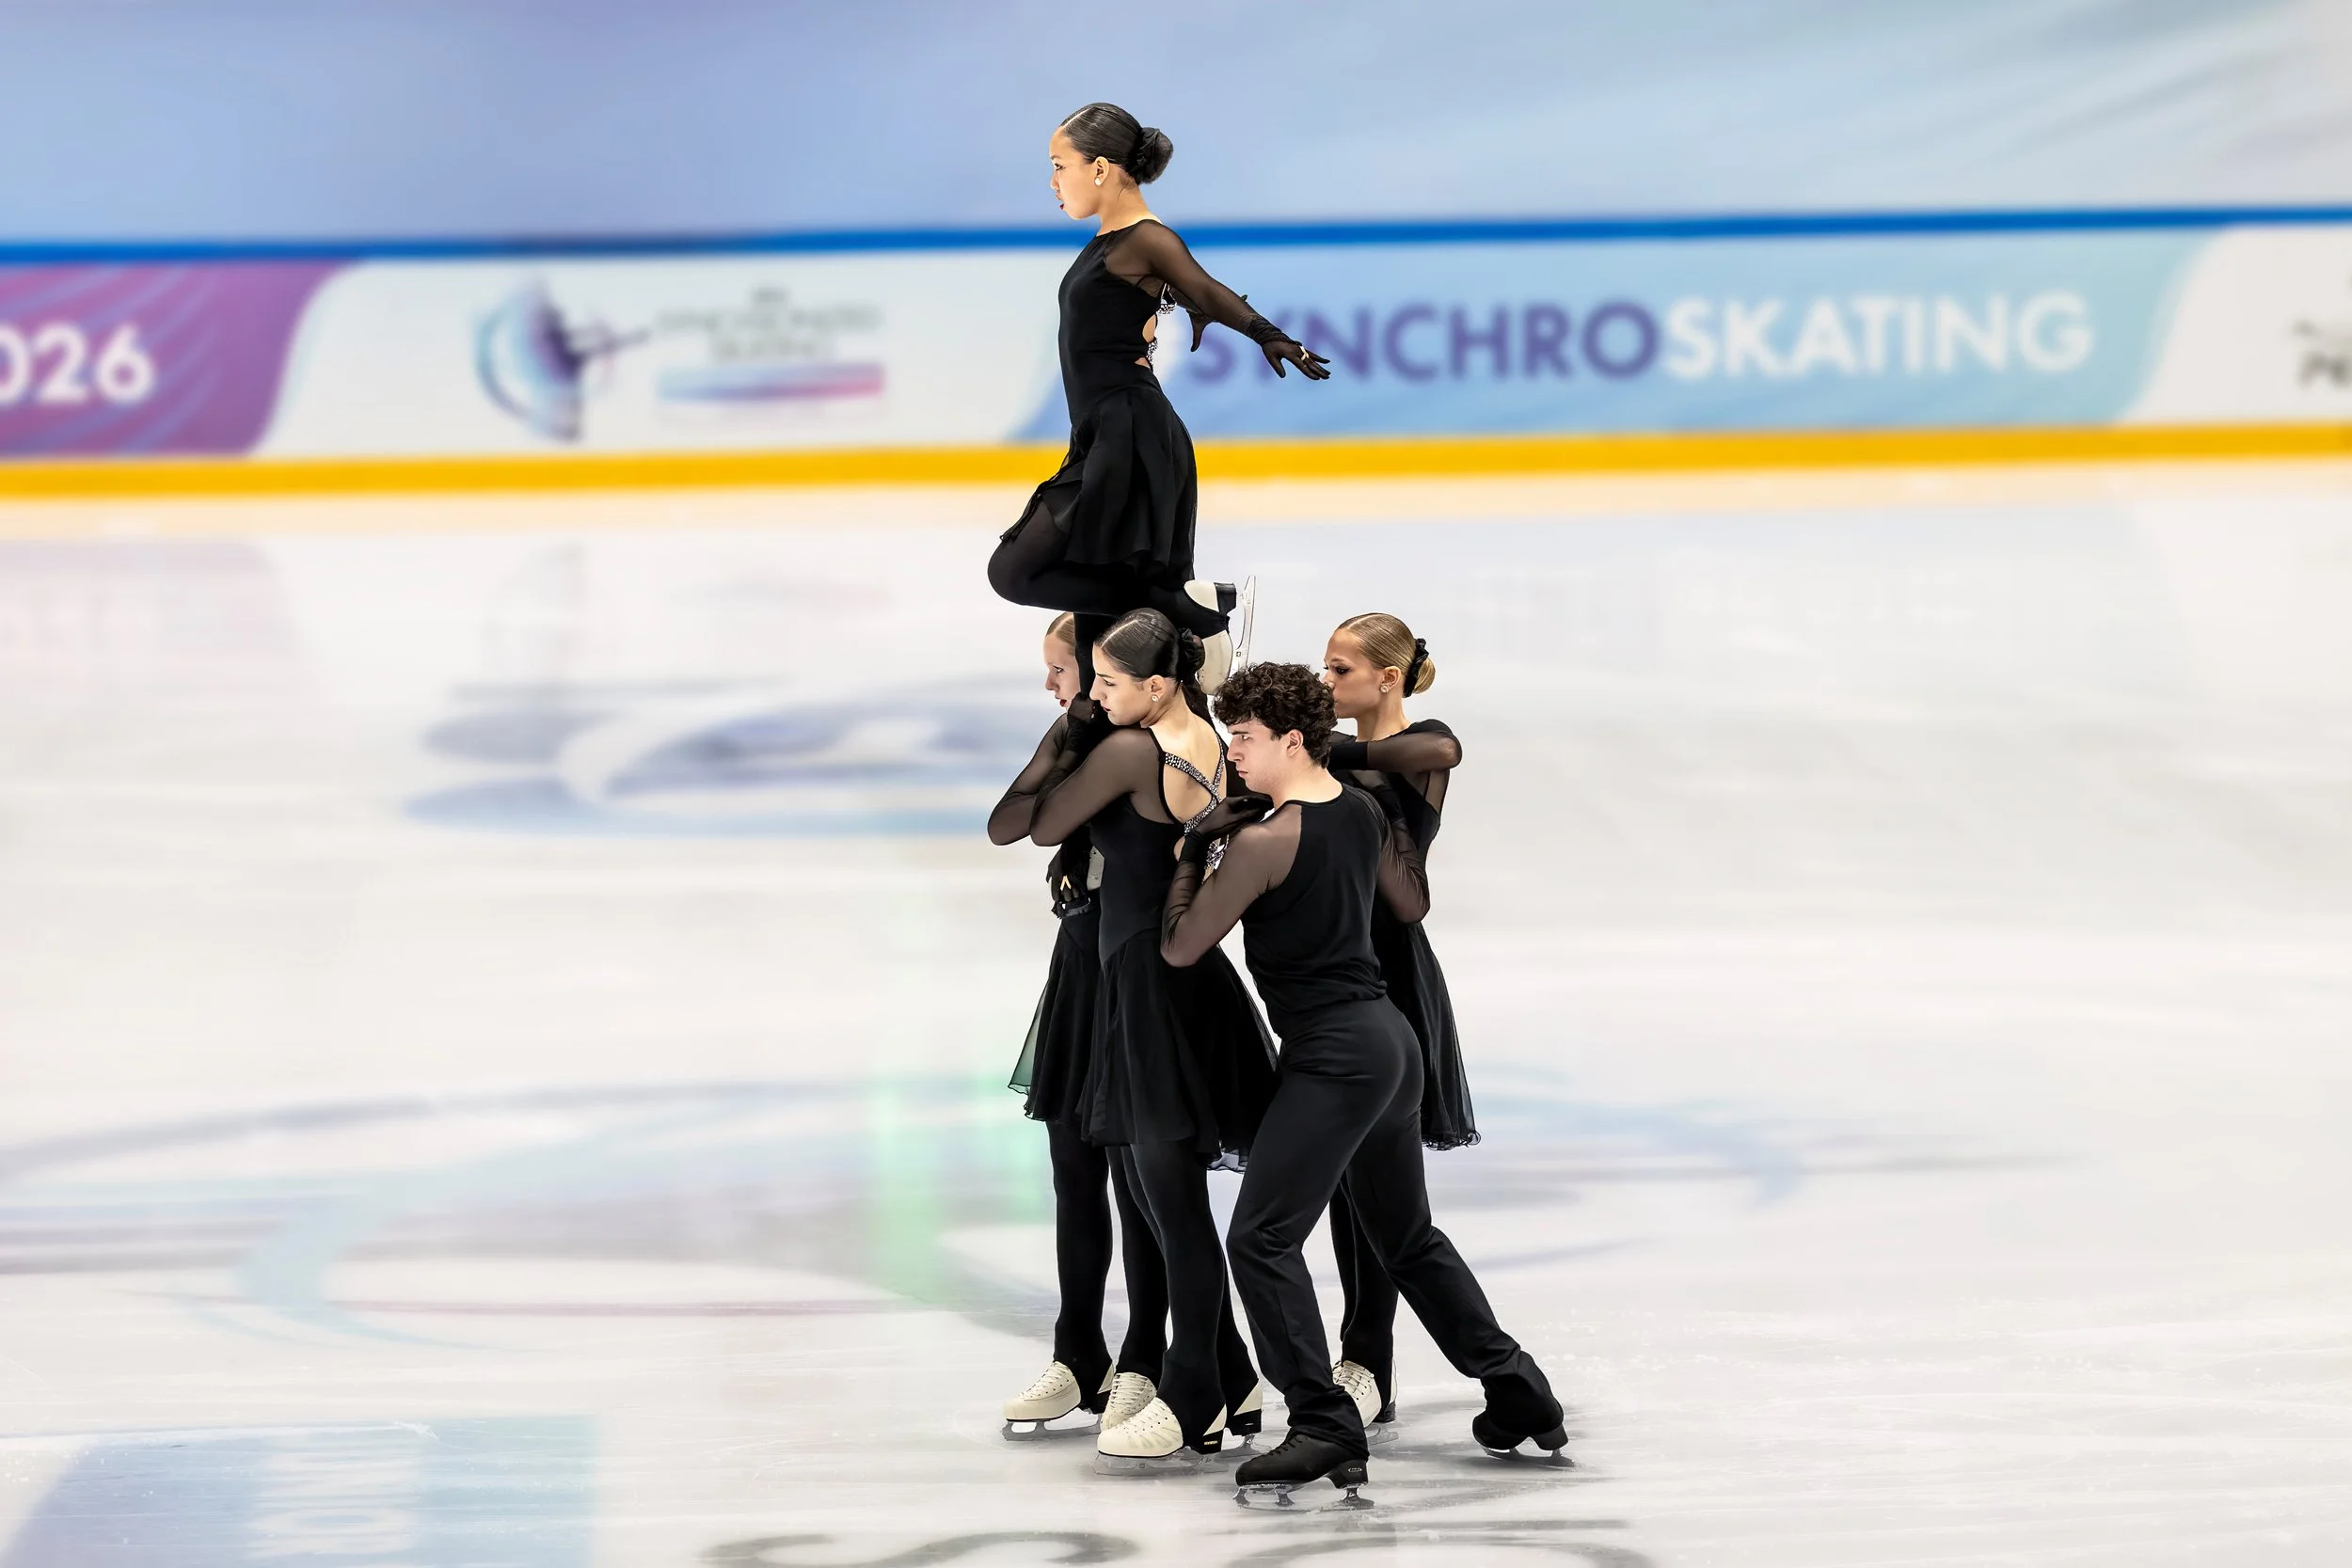
Capturing the Peak of an Element
For this lift:
Sony A1 • FE 70–200mm f/2.8 GM OSS II • 200mm • 1/1250 sec • f/3.5 • ISO 2500 • Continuous AF • Eye Tracking • Handheld
High-speed continuous shooting can provide multiple frames during an athletic element.
But more frames don't automatically produce a better photograph.
I'm looking for extension, symmetry, facial expression, body position and the instant when the athletic movement also becomes the strongest composition.
The camera can record the sequence.
The photographer still has to determine which frame tells the story.
Live Performance and Theater
When I Don't Control the Light
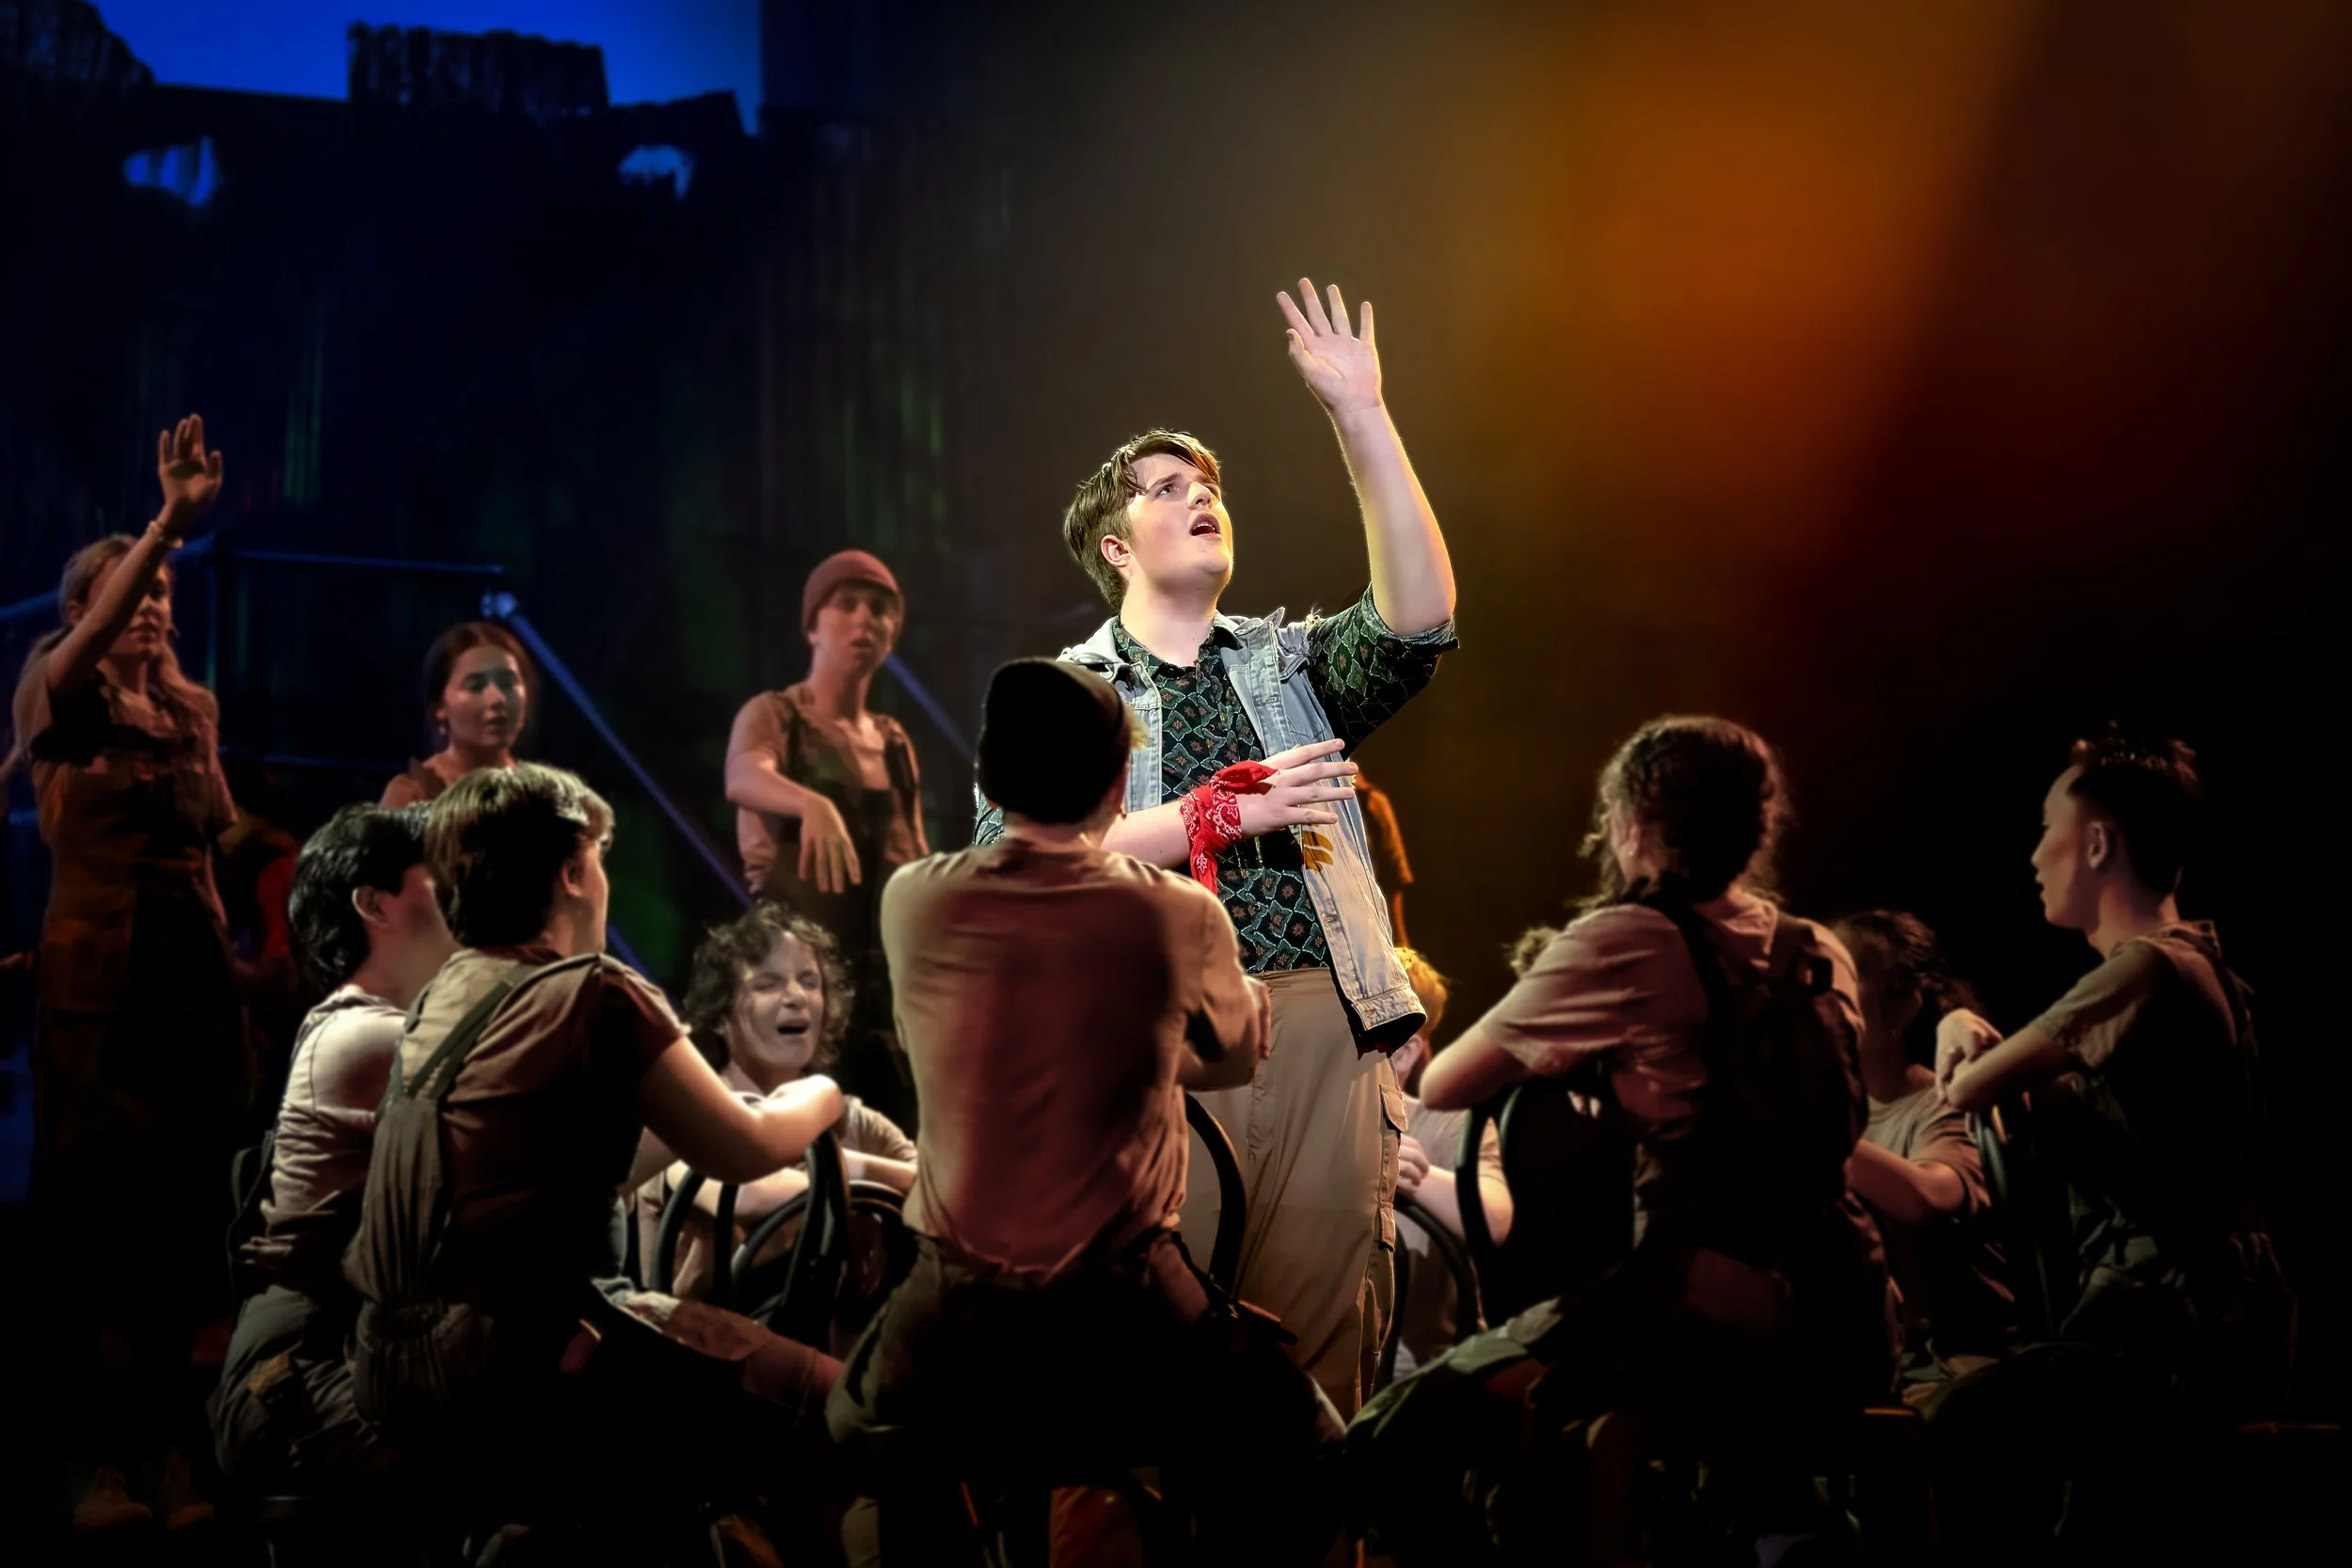
Live performance presents yet another set of photographic challenges.
I don't control the lighting.
A performer may move from relative darkness into an intense spotlight. Deep reds, blues or other saturated colors may dominate the stage. Bright faces or costumes can be surrounded by a background that falls almost completely to black.
Those colors aren't necessarily problems that need to be corrected.
They're part of the performance.
My objective is to preserve the atmosphere created by the performers and lighting designers while still maintaining detail and creating a photograph that communicates something about what it felt like to be there.
For this performance photograph:
Sony A1 • FE 70–200mm f/2.8 GM OSS II • 95mm • 1/640 sec • f/2.8 • ISO 3200 • Continuous AF • Eye Tracking • Handheld
The f/2.8 aperture is particularly valuable here because it allows more light to reach the sensor while still maintaining a fast enough shutter speed for moving performers.
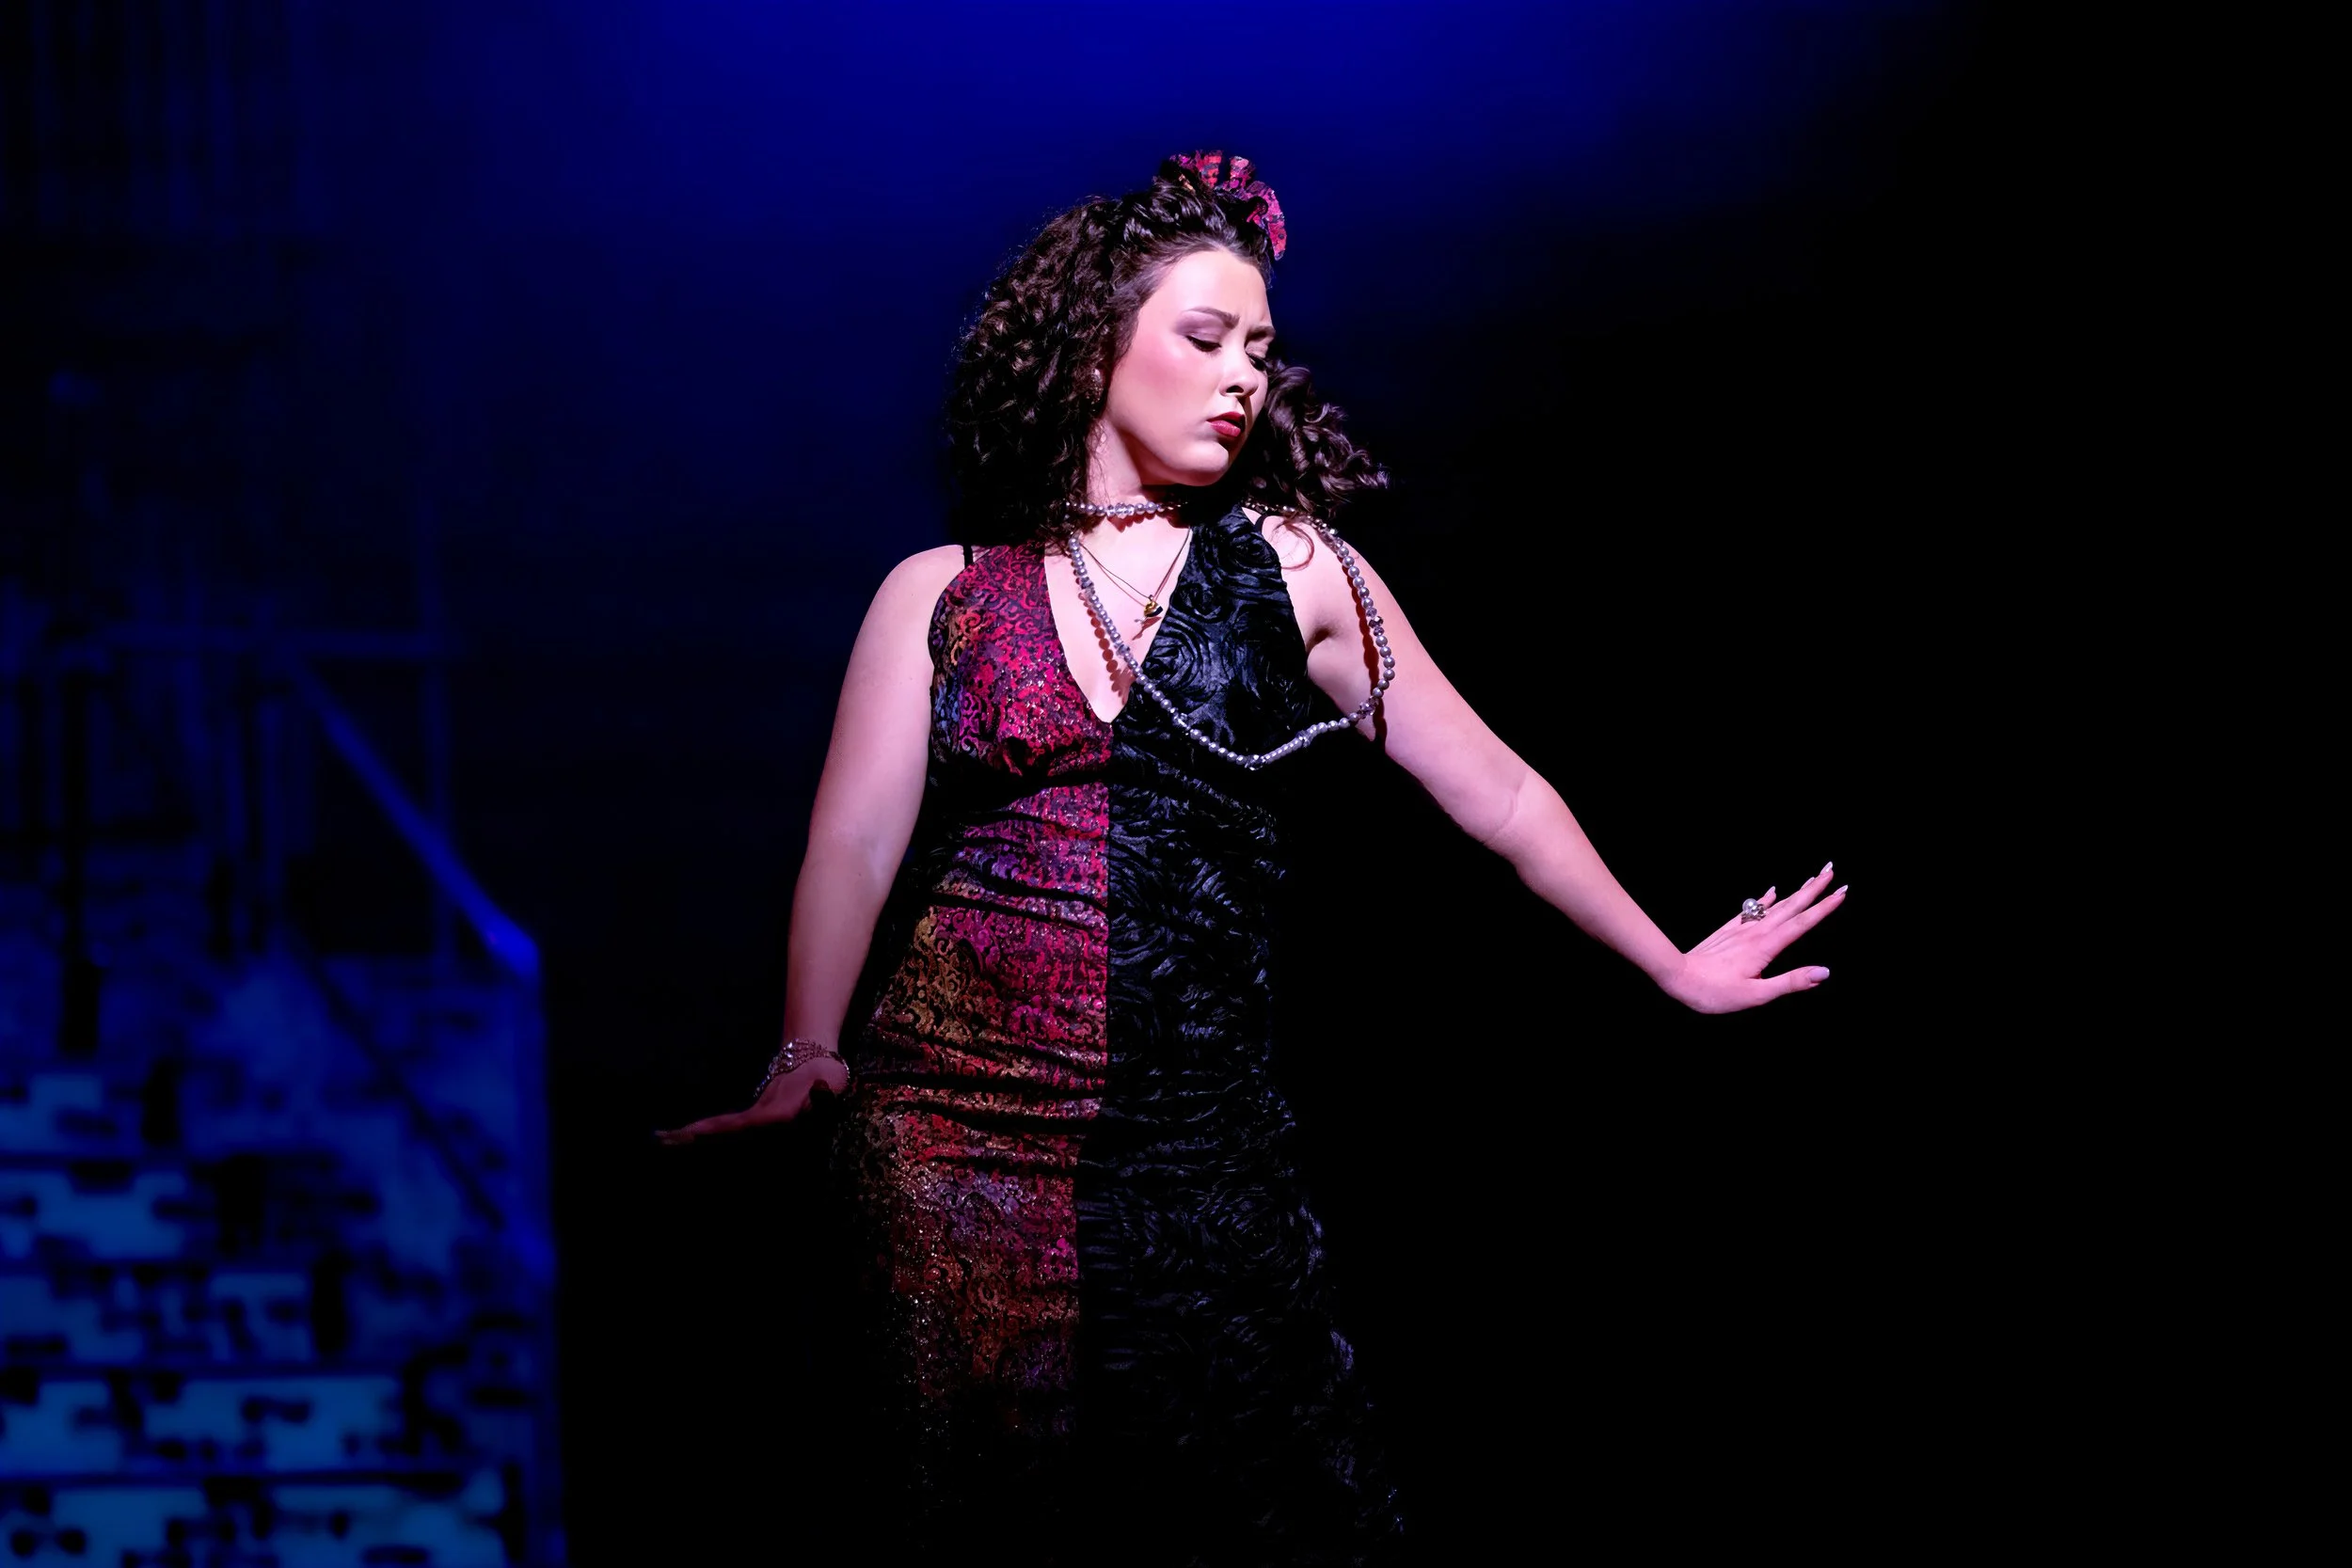
For this solo performer:
Sony A1 • FE 70–200mm f/2.8 GM OSS II • 200mm • 1/640 sec • f/2.8 • ISO 3200 • Continuous AF • Eye Tracking • Handheld
Notice that although these two images use almost identical exposure settings, the focal lengths are dramatically different.
One was photographed at 95mm.
The other at 200mm.
That's one reason the 70–200mm is so useful for performances: I can respond quickly to changing compositions without changing lenses.
Because of copyright restrictions, I was only permitted to photograph the production during a dress rehearsal. From a photography standpoint, however, that actually worked to my advantage. Without an audience in the theater, I could work much closer to the stage and position myself where I could capture the performers from the strongest angles without worrying about obstructing anyone's view or becoming a distraction.
What the dress rehearsal didn't change was the lighting challenge. I was still not permitted to use a flash or any other supplemental photography lighting, so every photograph had to be made using only the theatrical lighting designed for the production. That meant constantly adapting to performers moving between bright spotlights and deep shadows, along with dramatic changes in color and intensity.
In many ways, though, that's exactly what I want from these photographs. The goal isn't to make the stage look evenly lit—it isn't. The challenge is to work within the lighting the audience was intended to see while still capturing the performers, expressions and atmosphere of the production.
Portrait Photography
When I Do Control the Environment
Portrait photography reverses much of the equation.
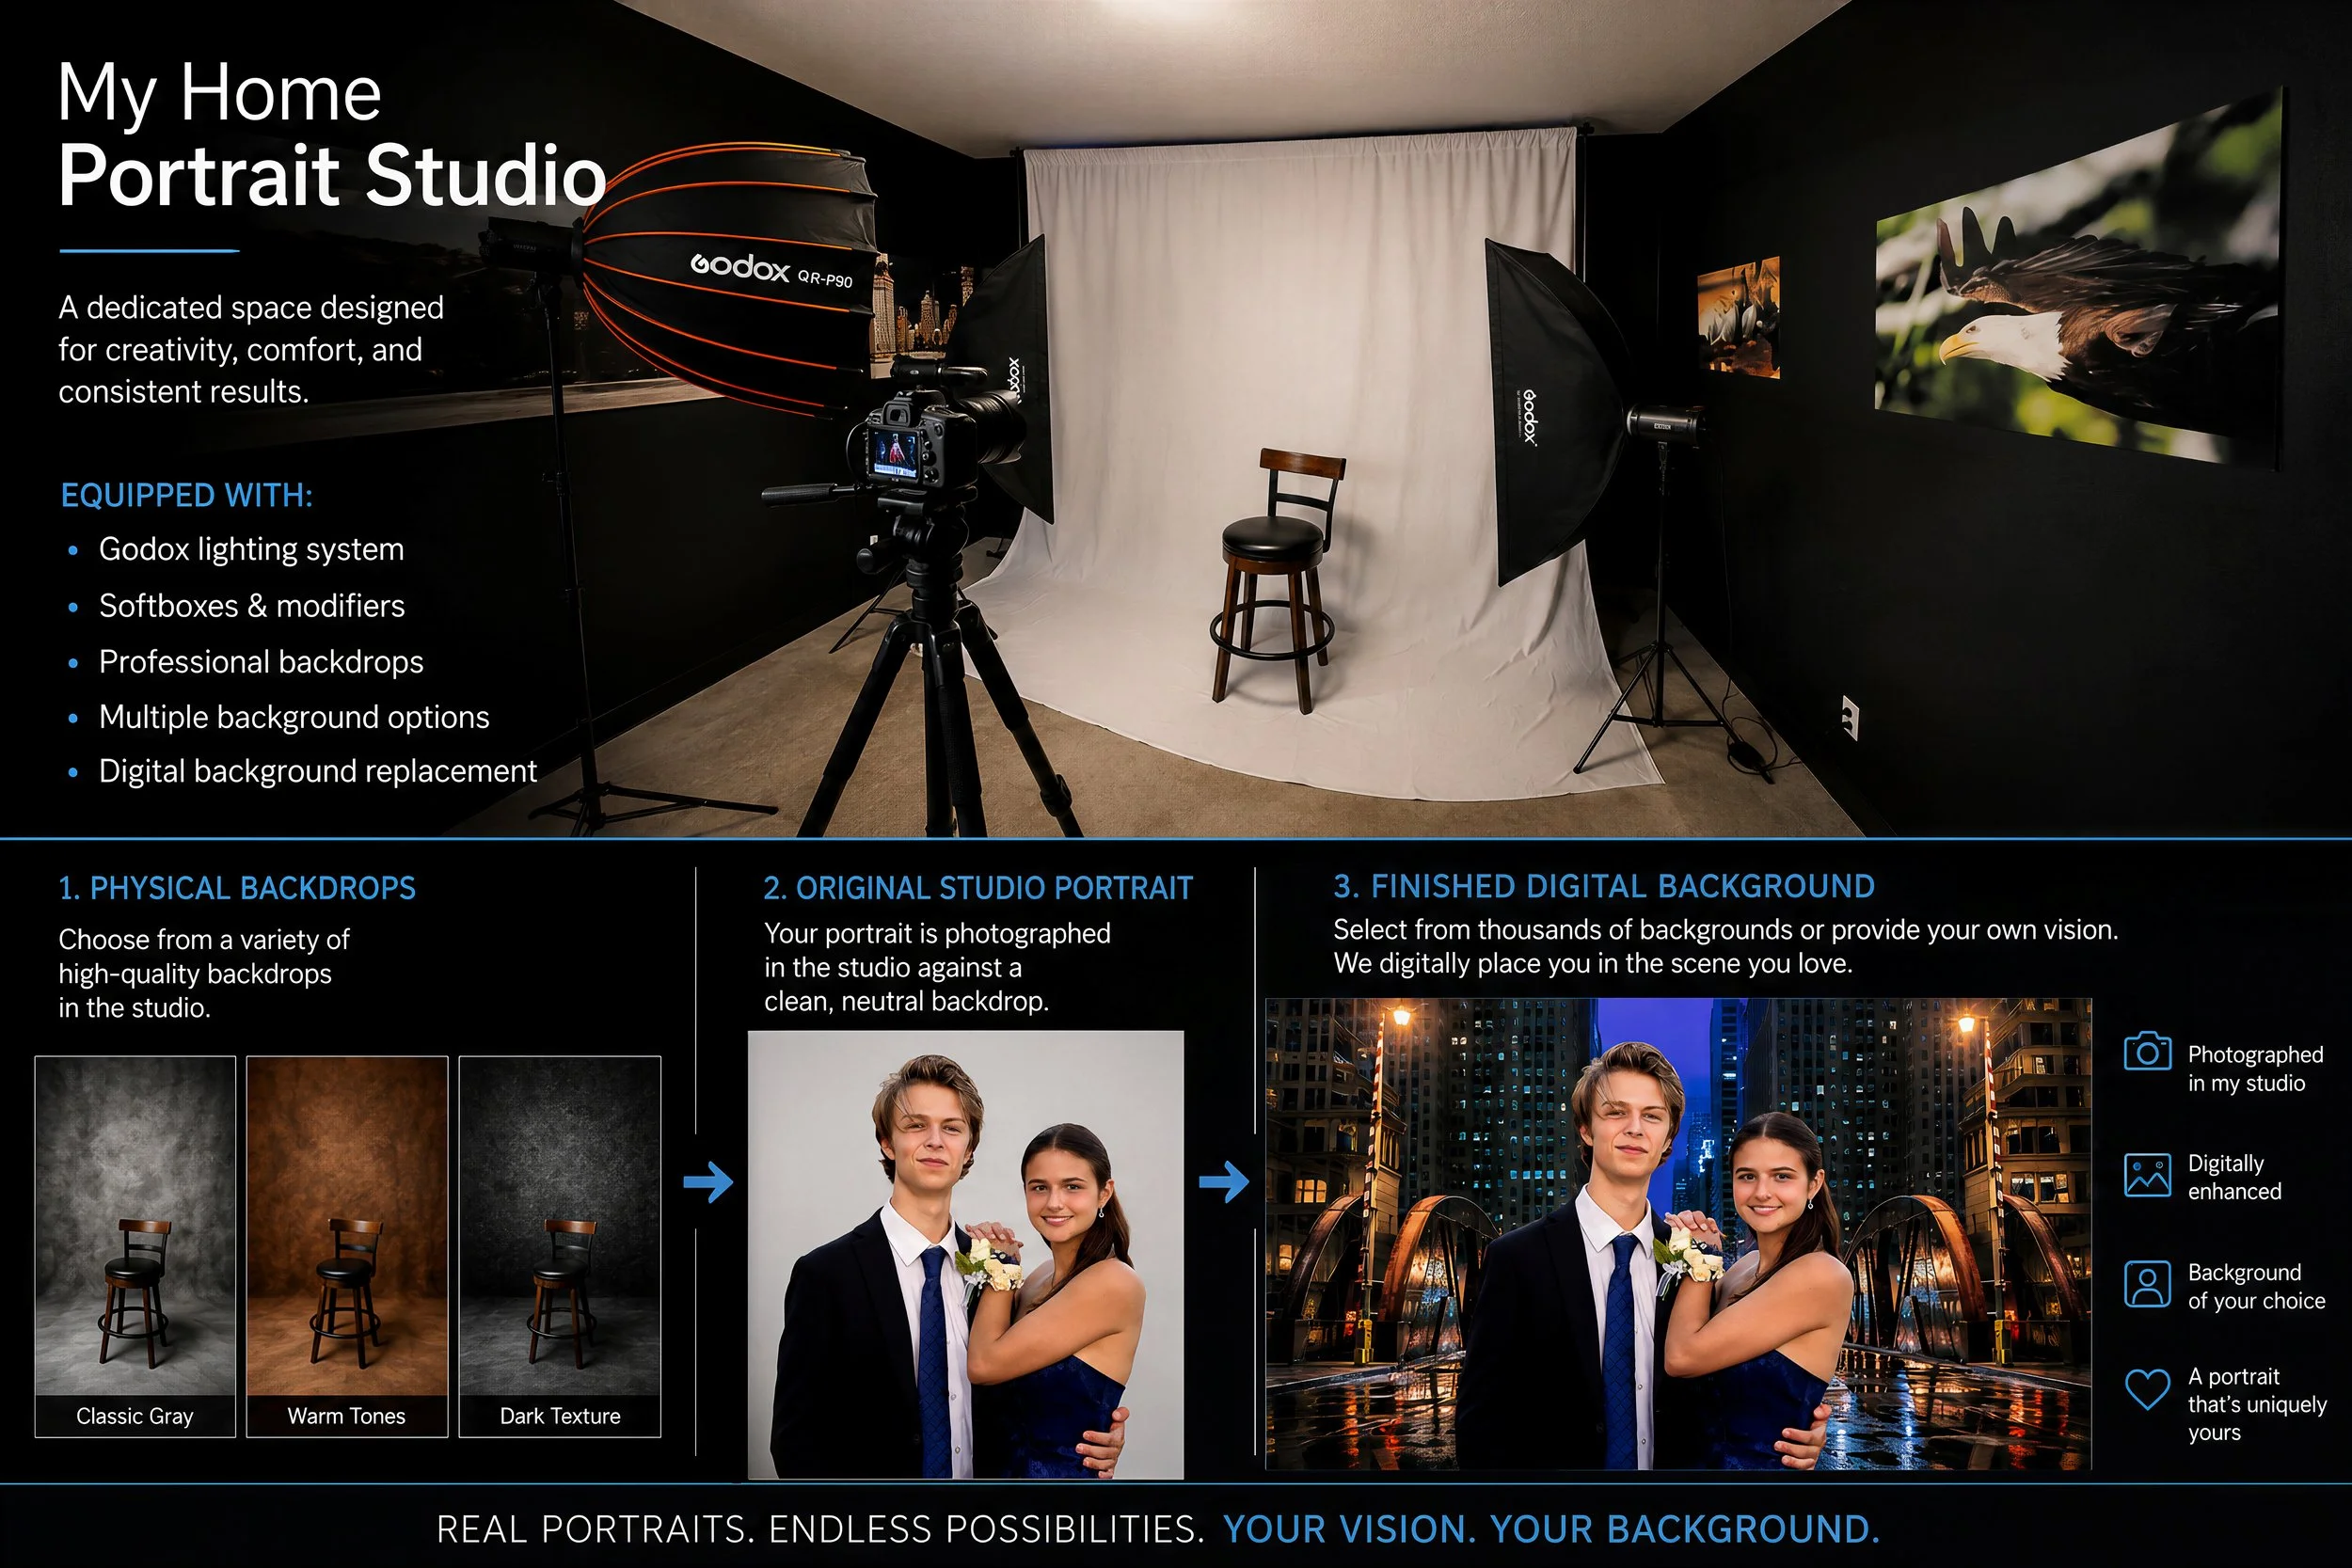
Instead of adapting entirely to existing conditions, I can create the lighting and control much more of the environment.
My dedicated home portrait studio includes Godox lighting and modifiers that allow me to control the direction, intensity and softness of the light. I also have multiple physical backgrounds available.
A clean portrait can also become the starting point for digital background replacement when the concept calls for something different.
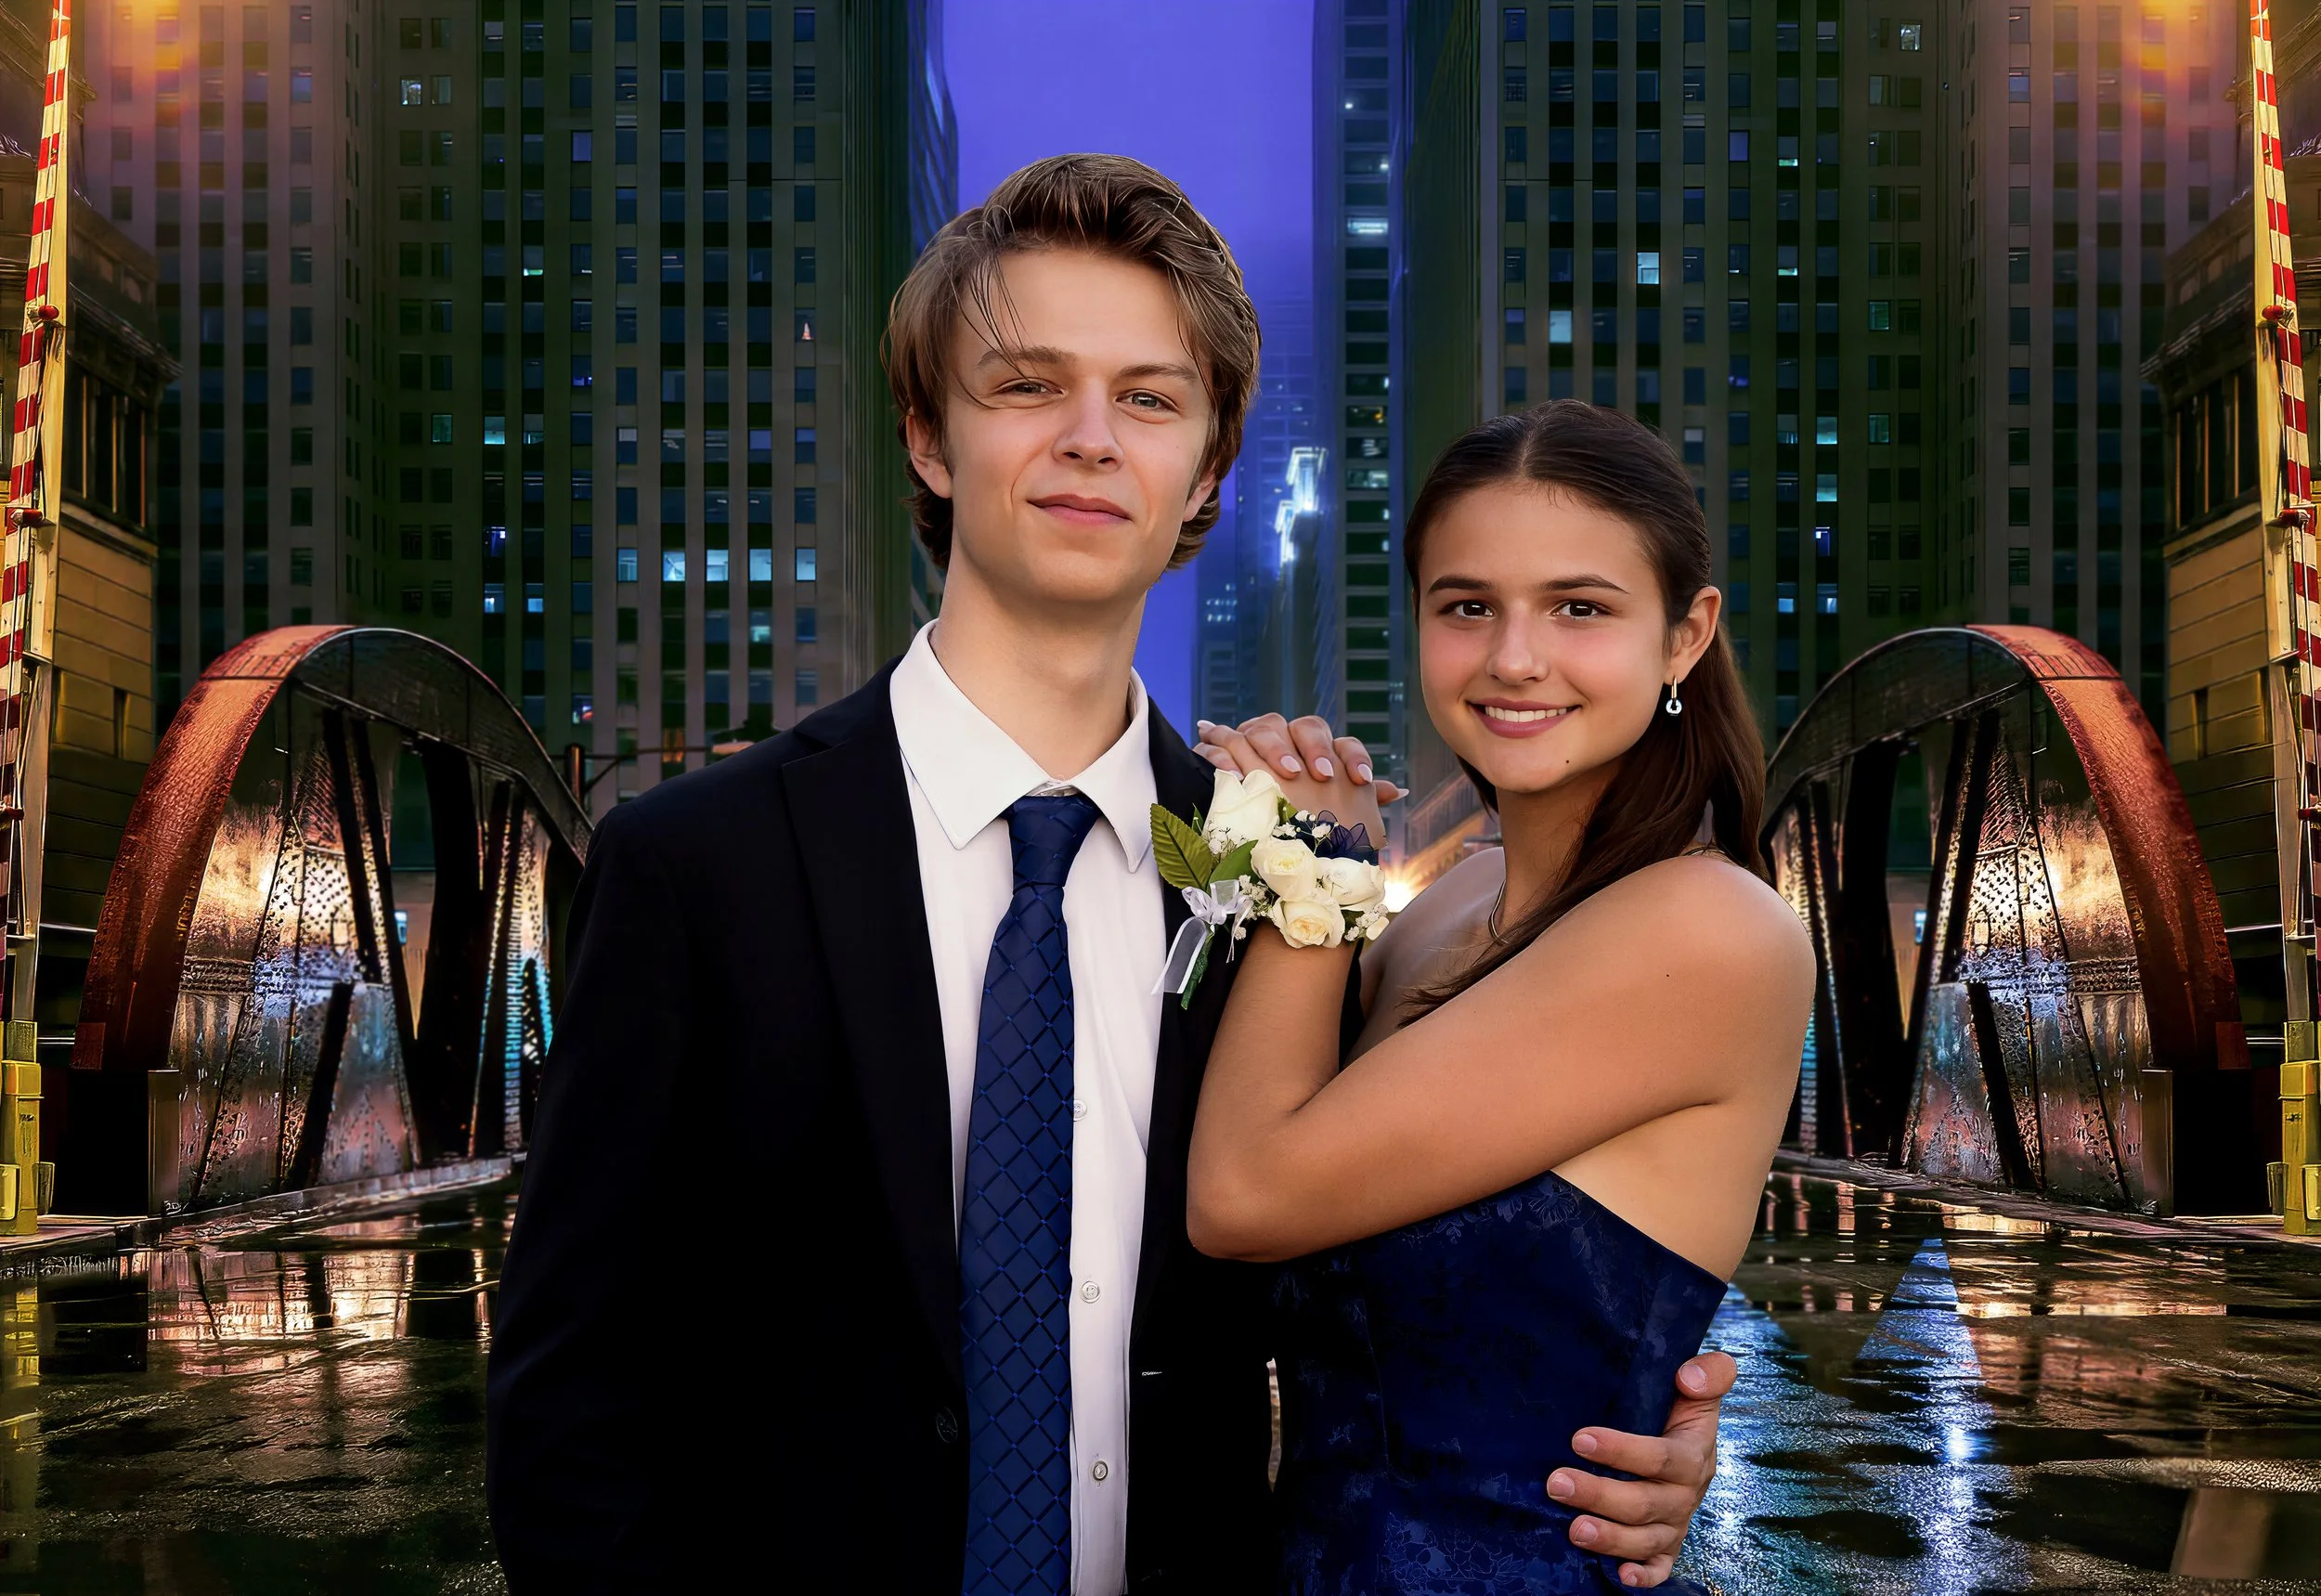
For this portrait:
Sony A1 • FE 24–70mm f/2.8 GM II • 59mm • 1/1250 sec • f/2.8 • ISO 800 • Continuous AF • Eye Tracking • Godox Softbox • Tripod
The 24–70mm gives me considerable flexibility for portraiture. It allows environmental compositions at the wider end while moving toward more traditional portrait framing as the focal length increases.
Digital background replacement is not something every portrait requires. It is simply another creative option.
When I do use it, the objective isn't merely to place a person onto another background. Perspective, light, color, edges and overall atmosphere all have to work together for the finished image to feel believable.
Landscapes and Cityscapes
When the Exposure Lasts Longer Than the Moment
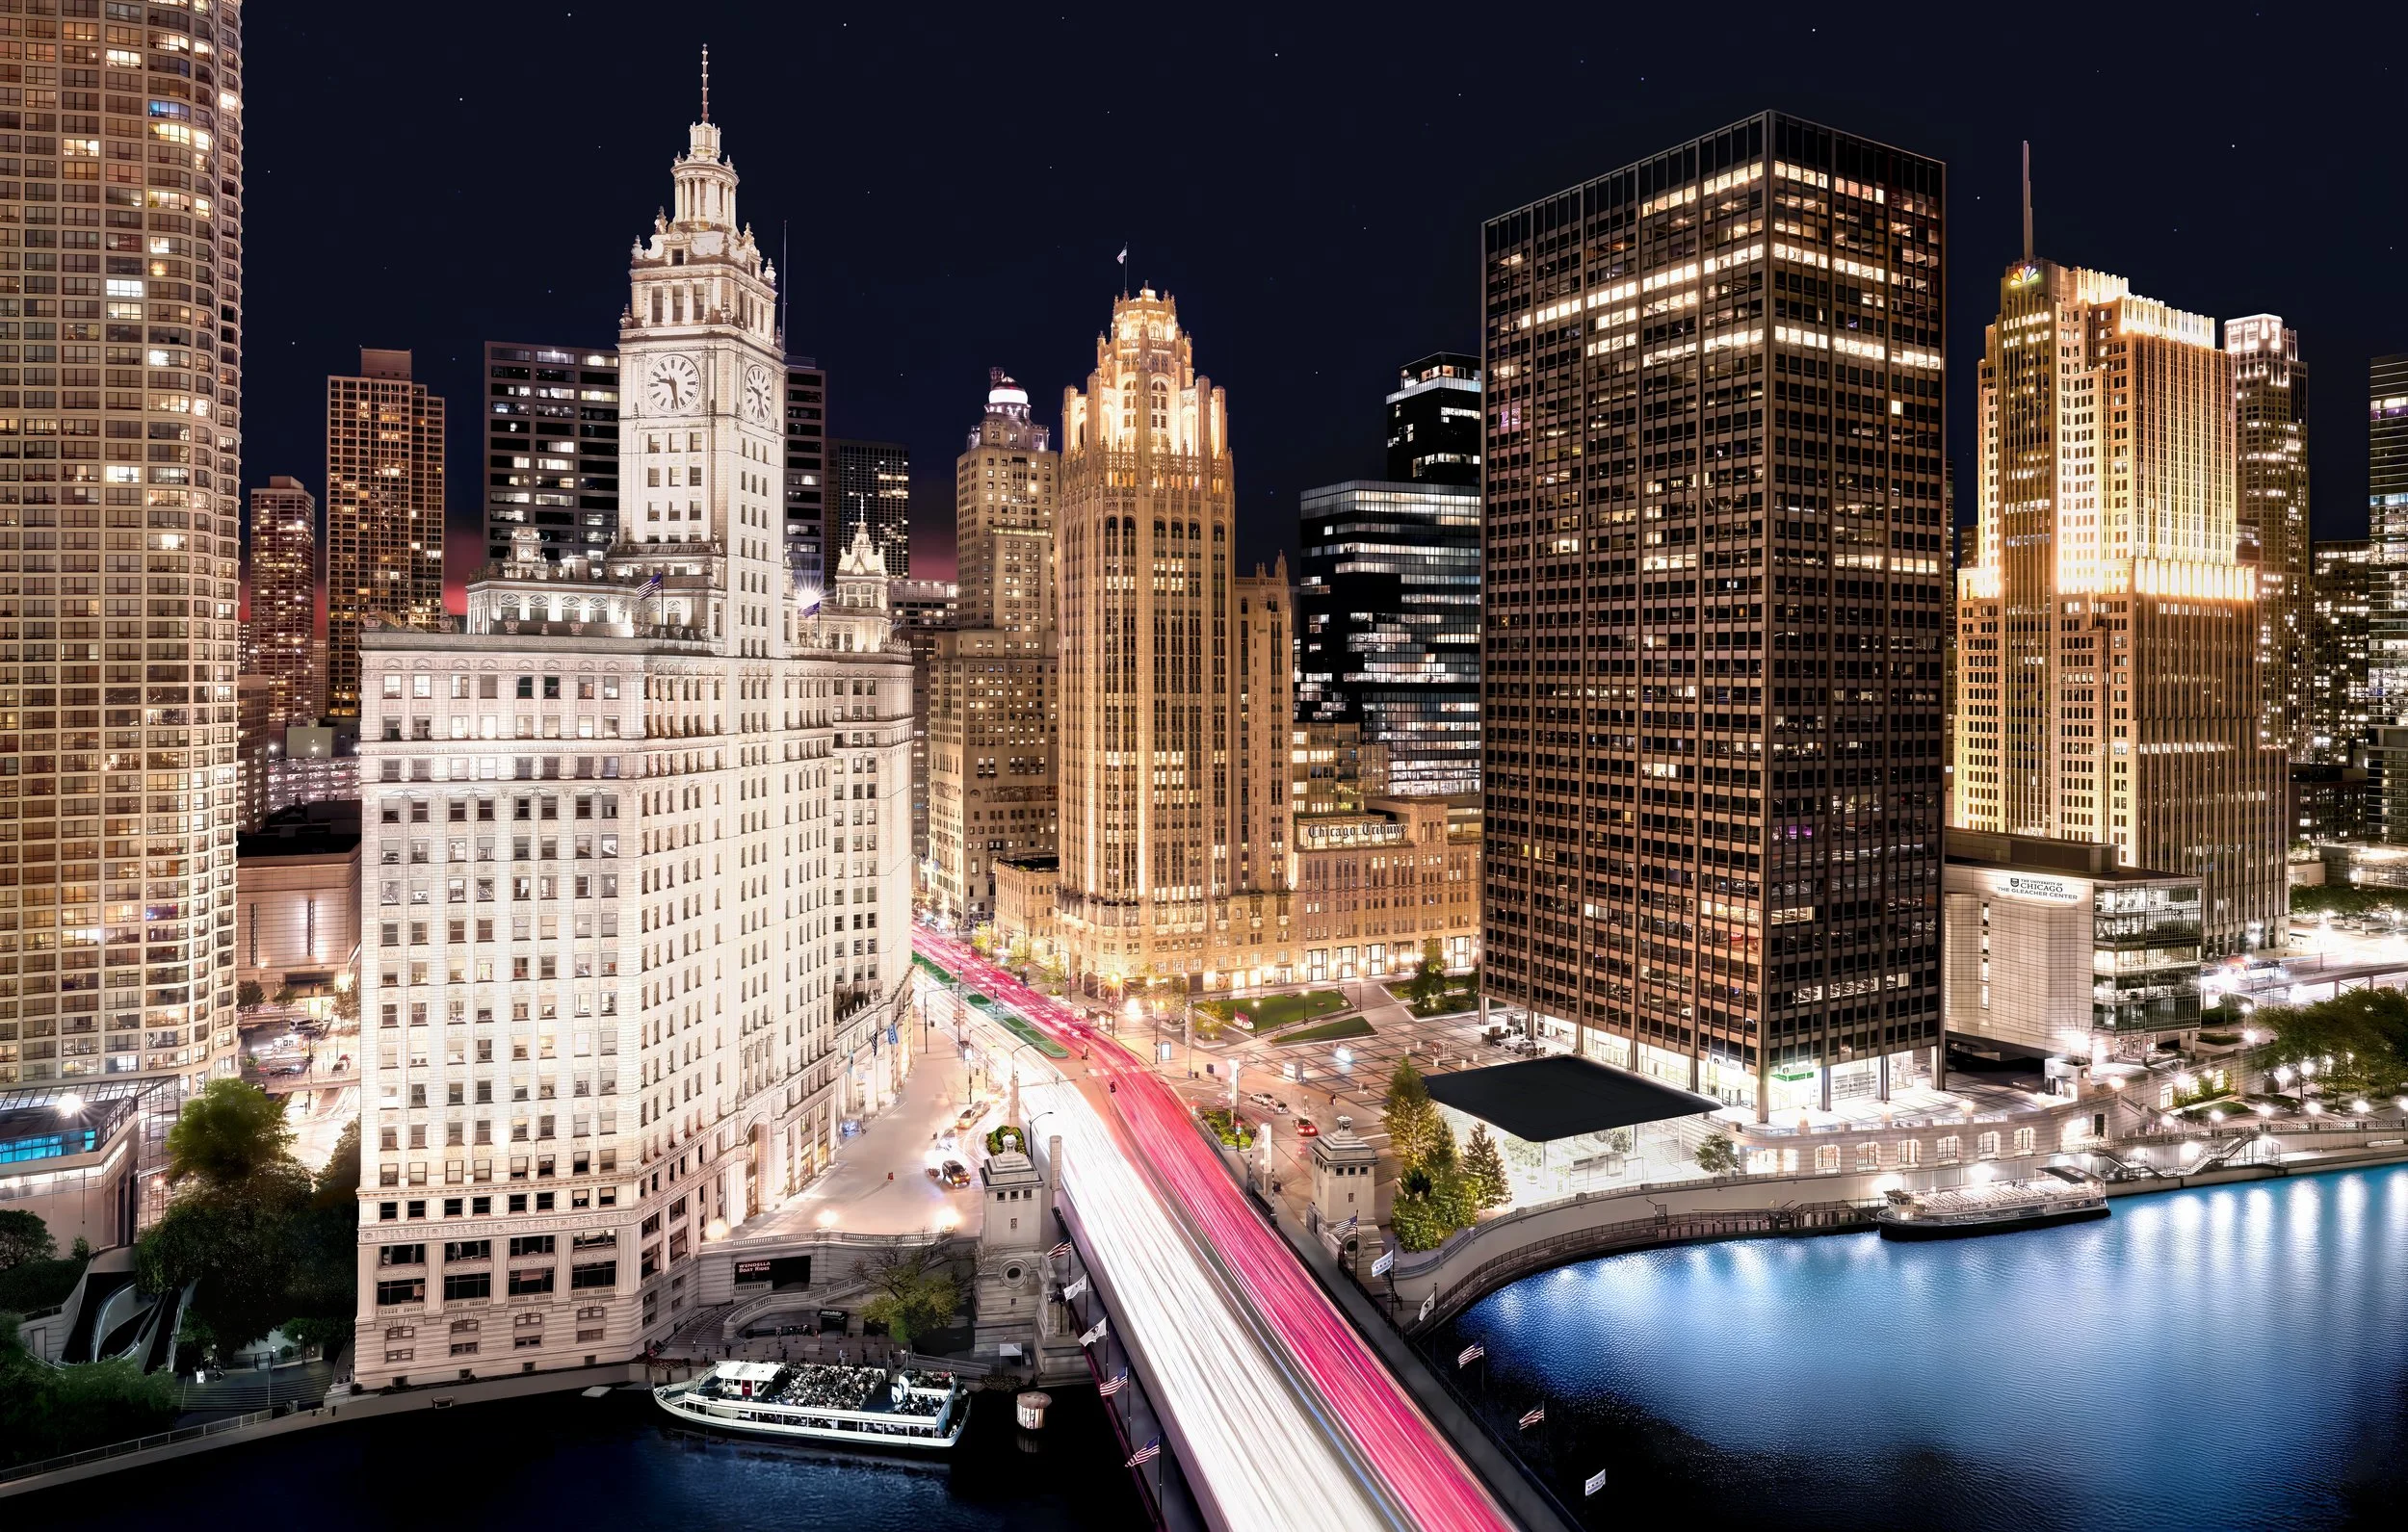
Few examples demonstrate the differences between photographic disciplines better than comparing a bird in flight with a nighttime cityscape.
For an eagle strike I used 1/2500 second.
For this Chicago cityscape, the shutter remained open for 30 seconds.
Behind This Shot
Sony A1 • FE 24–70mm f/2.8 GM II • 29mm • 30 seconds • f/22 • ISO 50 • Tripod
Almost everything about the technique has changed.
Instead of trying to follow an unpredictable subject through a long telephoto lens, the camera is fixed securely on a tripod.
Instead of raising ISO to achieve a very fast shutter speed, I can use ISO 50.
Instead of freezing motion, I intentionally allow the exposure to accumulate light for half a minute.
And instead of reacting instantly to something occurring in front of me, I have more opportunity to carefully refine the composition and wait for conditions to become what I want.
This photograph wasn't planned at all. I hadn't even considered making a cityscape photograph until I opened the curtains of our hotel room and saw this incredible view of Chicago stretching out in front of me. I immediately knew it was an opportunity I didn't want to miss.
Rather than simply photographing the view as I saw it, I wanted to use a long exposure to capture the energy of the city at night. Keeping the shutter open would allow the distant stars, buildings, and city lights to illuminate the scene while transforming the moving traffic along world-famous Michigan Avenue below into streams of light.
So, an unexpected view from a hotel-room window became a completely different kind of photographic opportunity—and a good reminder that sometimes preparation means knowing where to be, while other times it simply means recognizing the photograph when it suddenly appears in front of you.
This single comparison illustrates why there really is no universal set of “best camera settings.”
The appropriate settings depend entirely on the photograph.
From Capture to Finished Photograph
What Happens After I Press the Shutter
Capturing the photograph is only the beginning of the process.
My post-processing workflow primarily uses Adobe Lightroom Classic, Adobe Photoshop and Topaz Photo AI.
Different photographs require different types of work.
Wildlife photographs may benefit from careful cropping, selective noise reduction and detail work.
Performance photography may require significant attention to exposure, shadows and difficult stage colors.
Portraits may involve retouching or optional background replacement.
Landscape and fine-art photographs may require extensive tonal and color refinement followed by careful preparation for large-format printing.
The objective isn't to use every tool available.
It's to determine what the photograph actually needs.
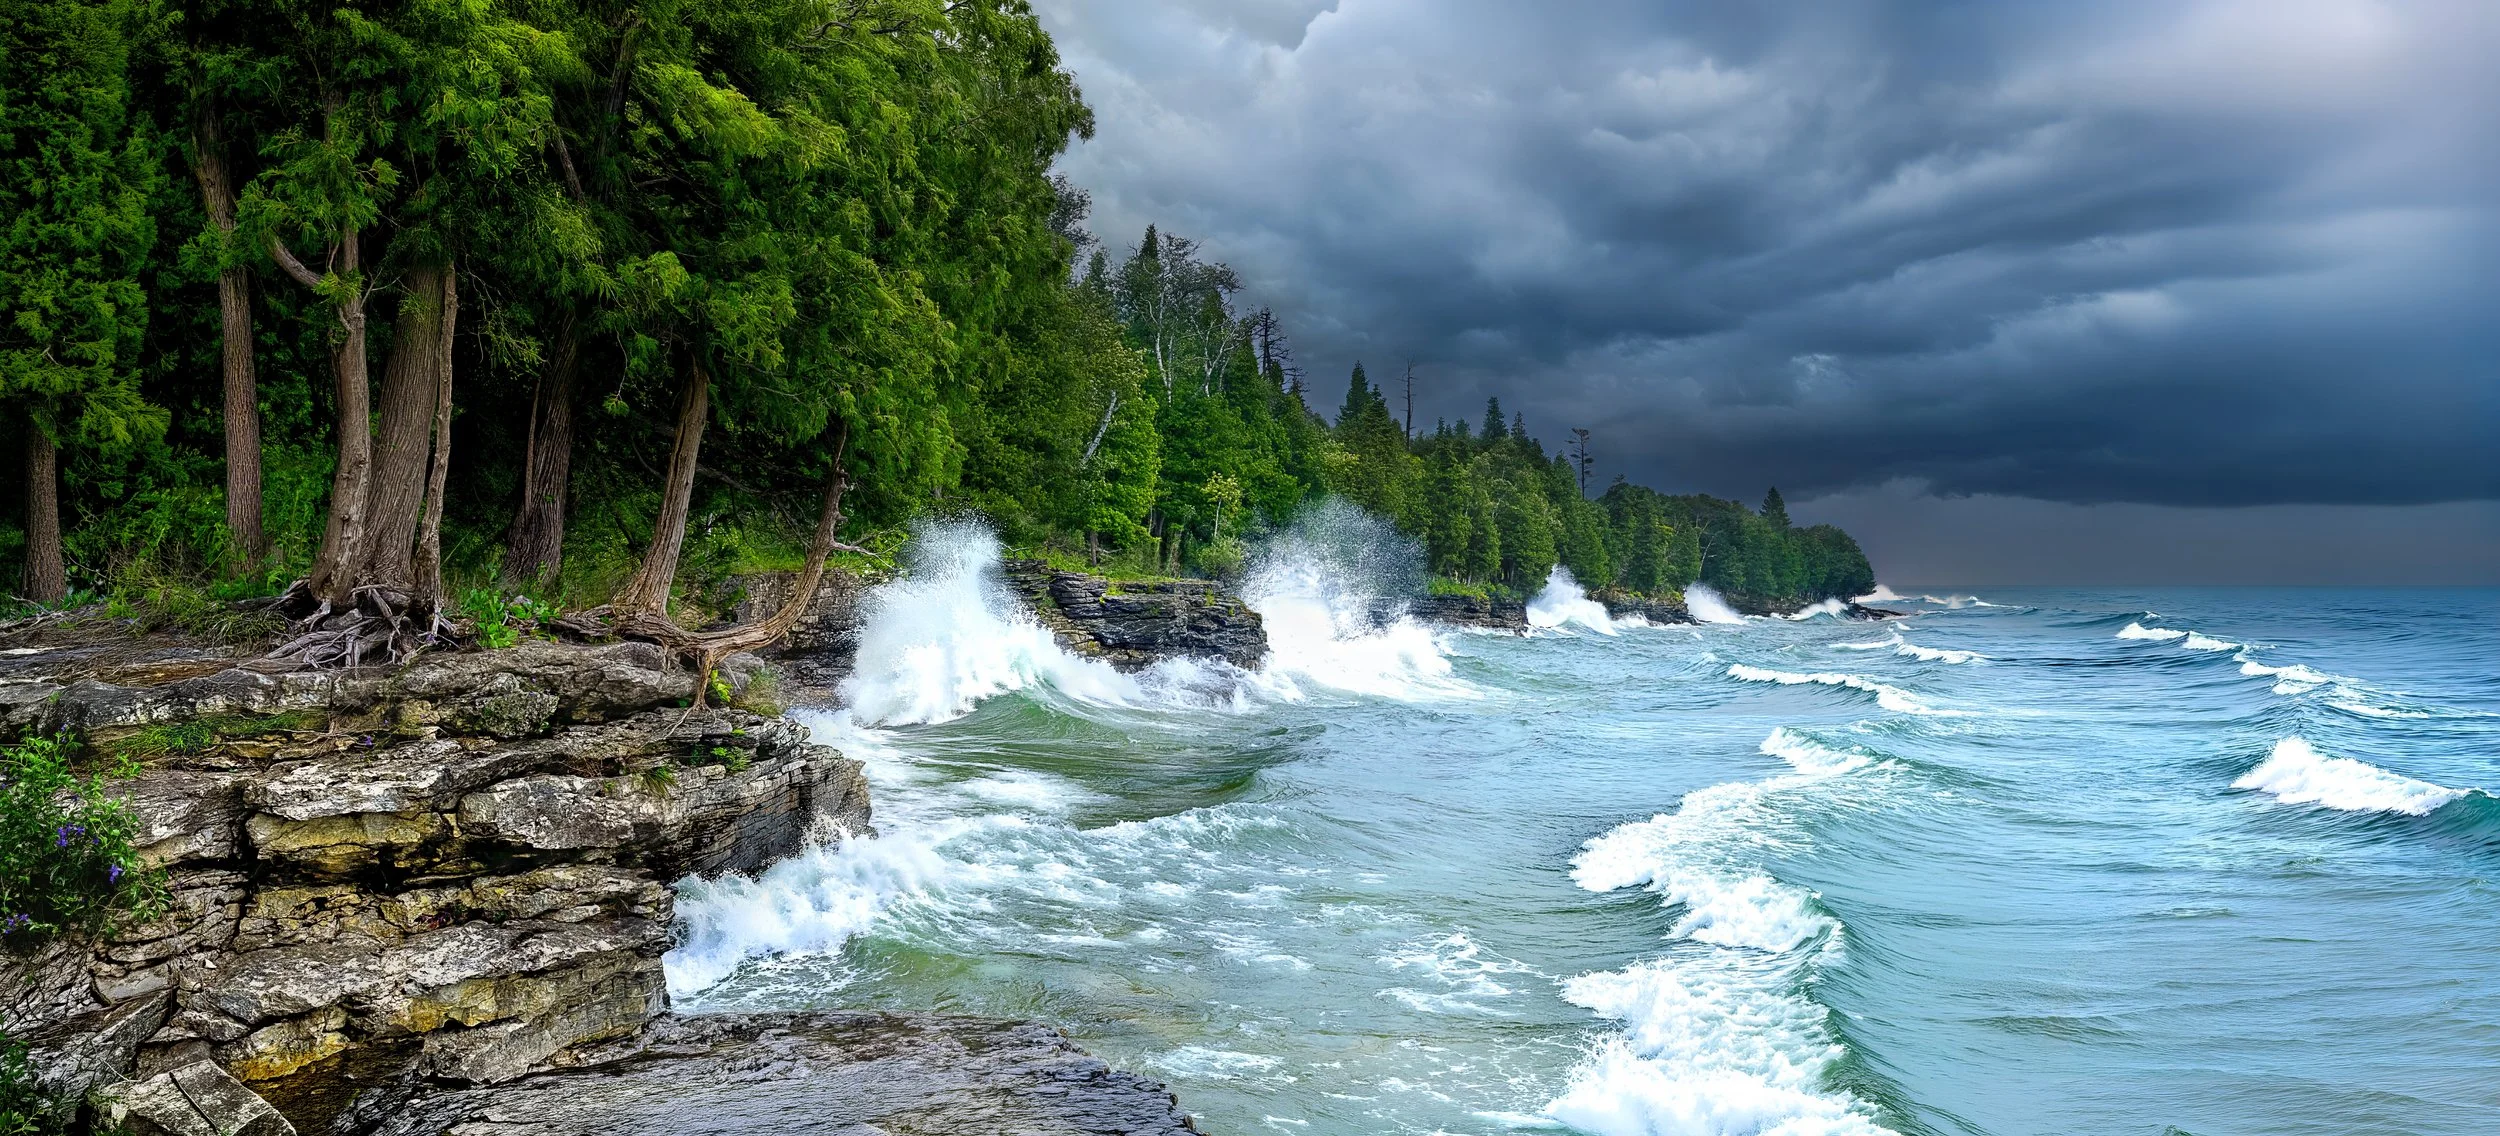
Beyond Death's Door
Beyond Death's Door, photographed at Cave Point in Door County, is a particularly good example.
The photograph itself was made with:
Sony A1 • FE 24–70mm f/2.8 GM II • 24mm • 1/2500 sec • f/6.3 • ISO 800 • Handheld
That's interesting because the photograph looks like the type of landscape image someone might assume was created slowly from a tripod.
It wasn't.
The turbulent water required a very different approach. The 1/2500-second shutter speed allowed me to capture detail within the breaking waves while working handheld.
I had hoped for much more pleasant weather during my short visit to Door County. Instead, the forecast called for Canadian wildfire smoke, rain and high winds—not exactly the conditions I had envisioned for a summer trip.
From a vacation standpoint, the weather was disappointing. From a photography standpoint, it turned out to be an opportunity.
When I arrived at Cave Point, the high winds had transformed Lake Michigan. Large waves were crashing violently against the rocky shoreline, while the heavy clouds and smoky atmosphere gave the entire scene a dark, almost ominous character. Instead of the picturesque summer landscape I might normally have photographed, I was seeing a much more powerful side of Door County.
Those conditions ultimately became an essential part of “Beyond Death’s Door.” The turbulent water, dramatic sky and rugged shoreline created an image that I could never have made on a calm, sunny day. In fact, the photograph seems to capture something much more fundamental about this place—the dangerous waters and violent conditions that helped give Door County its name.
The weather I initially wished would go away became the very thing that made the photograph.
The finished image required additional work before it became the photograph I ultimately wanted.
Color, tonal balance, wave detail, overall brightness and the panoramic composition all required careful attention. Preparing the image for a physical print introduced another consideration: a photograph displayed on a bright computer monitor doesn't necessarily reproduce identically on metal.
The final version was prepared as a 20 × 44-inch panoramic metal print.
Modern AI-assisted tools can be useful for tasks such as noise reduction, sharpening, selections or enlargement.
But they don't replace the original photograph.
The light, subject, moment and fundamental composition still have to exist in the capture.
Different Subjects. Different Techniques. Same Goal.
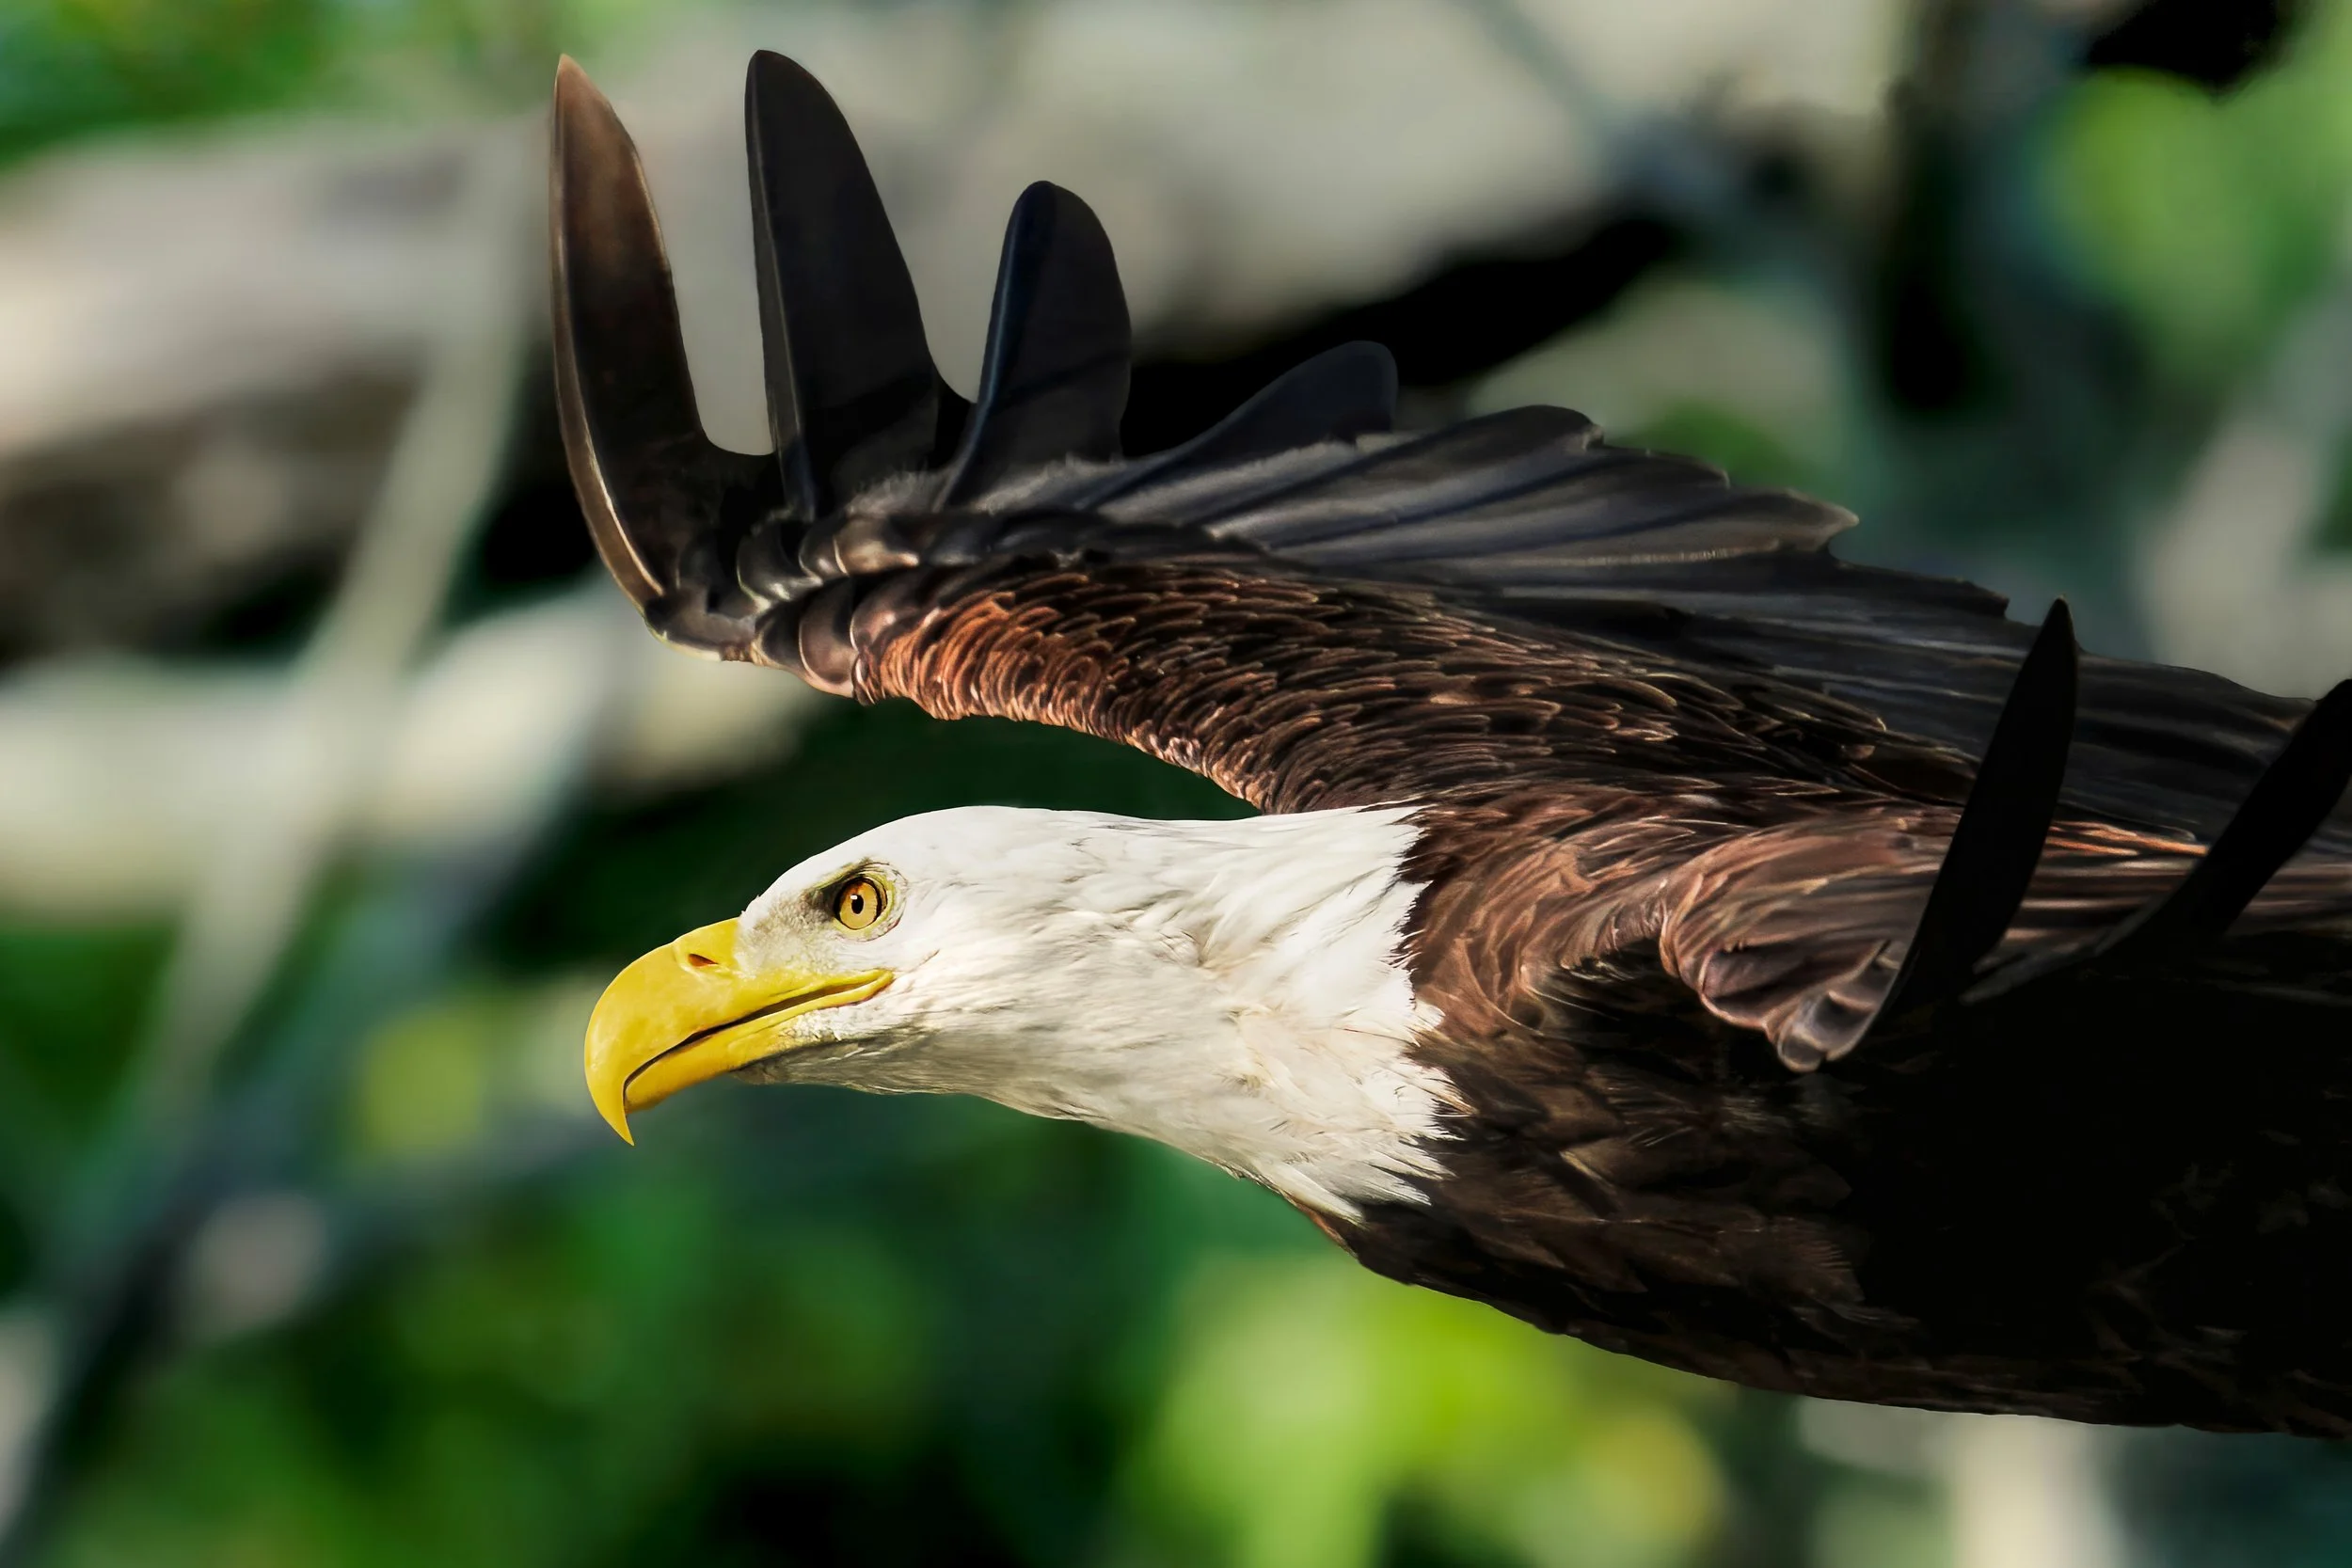
This eagle provides one more example of how equipment can expand what is photographically possible.
Sony A1 • FE 200–600mm G OSS + 2× TC • 1200mm • 1/2500 sec • f/16 • ISO 10,000 • Continuous AF • Eye Tracking • Handheld
The numbers themselves tell part of the story.
At 1200mm and f/16, considerably less light is reaching the sensor than would be available with the 200–600mm lens alone. Maintaining a 1/2500-second shutter speed required the ISO to rise all the way to 10,000.
That's the tradeoff.
The teleconverter provides extraordinary reach.
Modern camera technology and careful post-processing make it possible to work at ISO values that would once have seriously limited image quality.
But using that capability successfully still requires understanding why those compromises are being made.
A bird in flight, a figure skater, a theatrical performance, a portrait and a nighttime skyline may have very little in common technically.
One photograph uses:
1200mm • 1/2500 sec • ISO 10,000
Another:
29mm • 30 seconds • ISO 50
Those numbers could hardly be more different.
Yet underneath them, the fundamentals remain remarkably similar:
Understand the subject.
Pay attention to the light.
Choose the right position.
Select the appropriate tools.
Anticipate what is going to happen.
And be ready when it does.
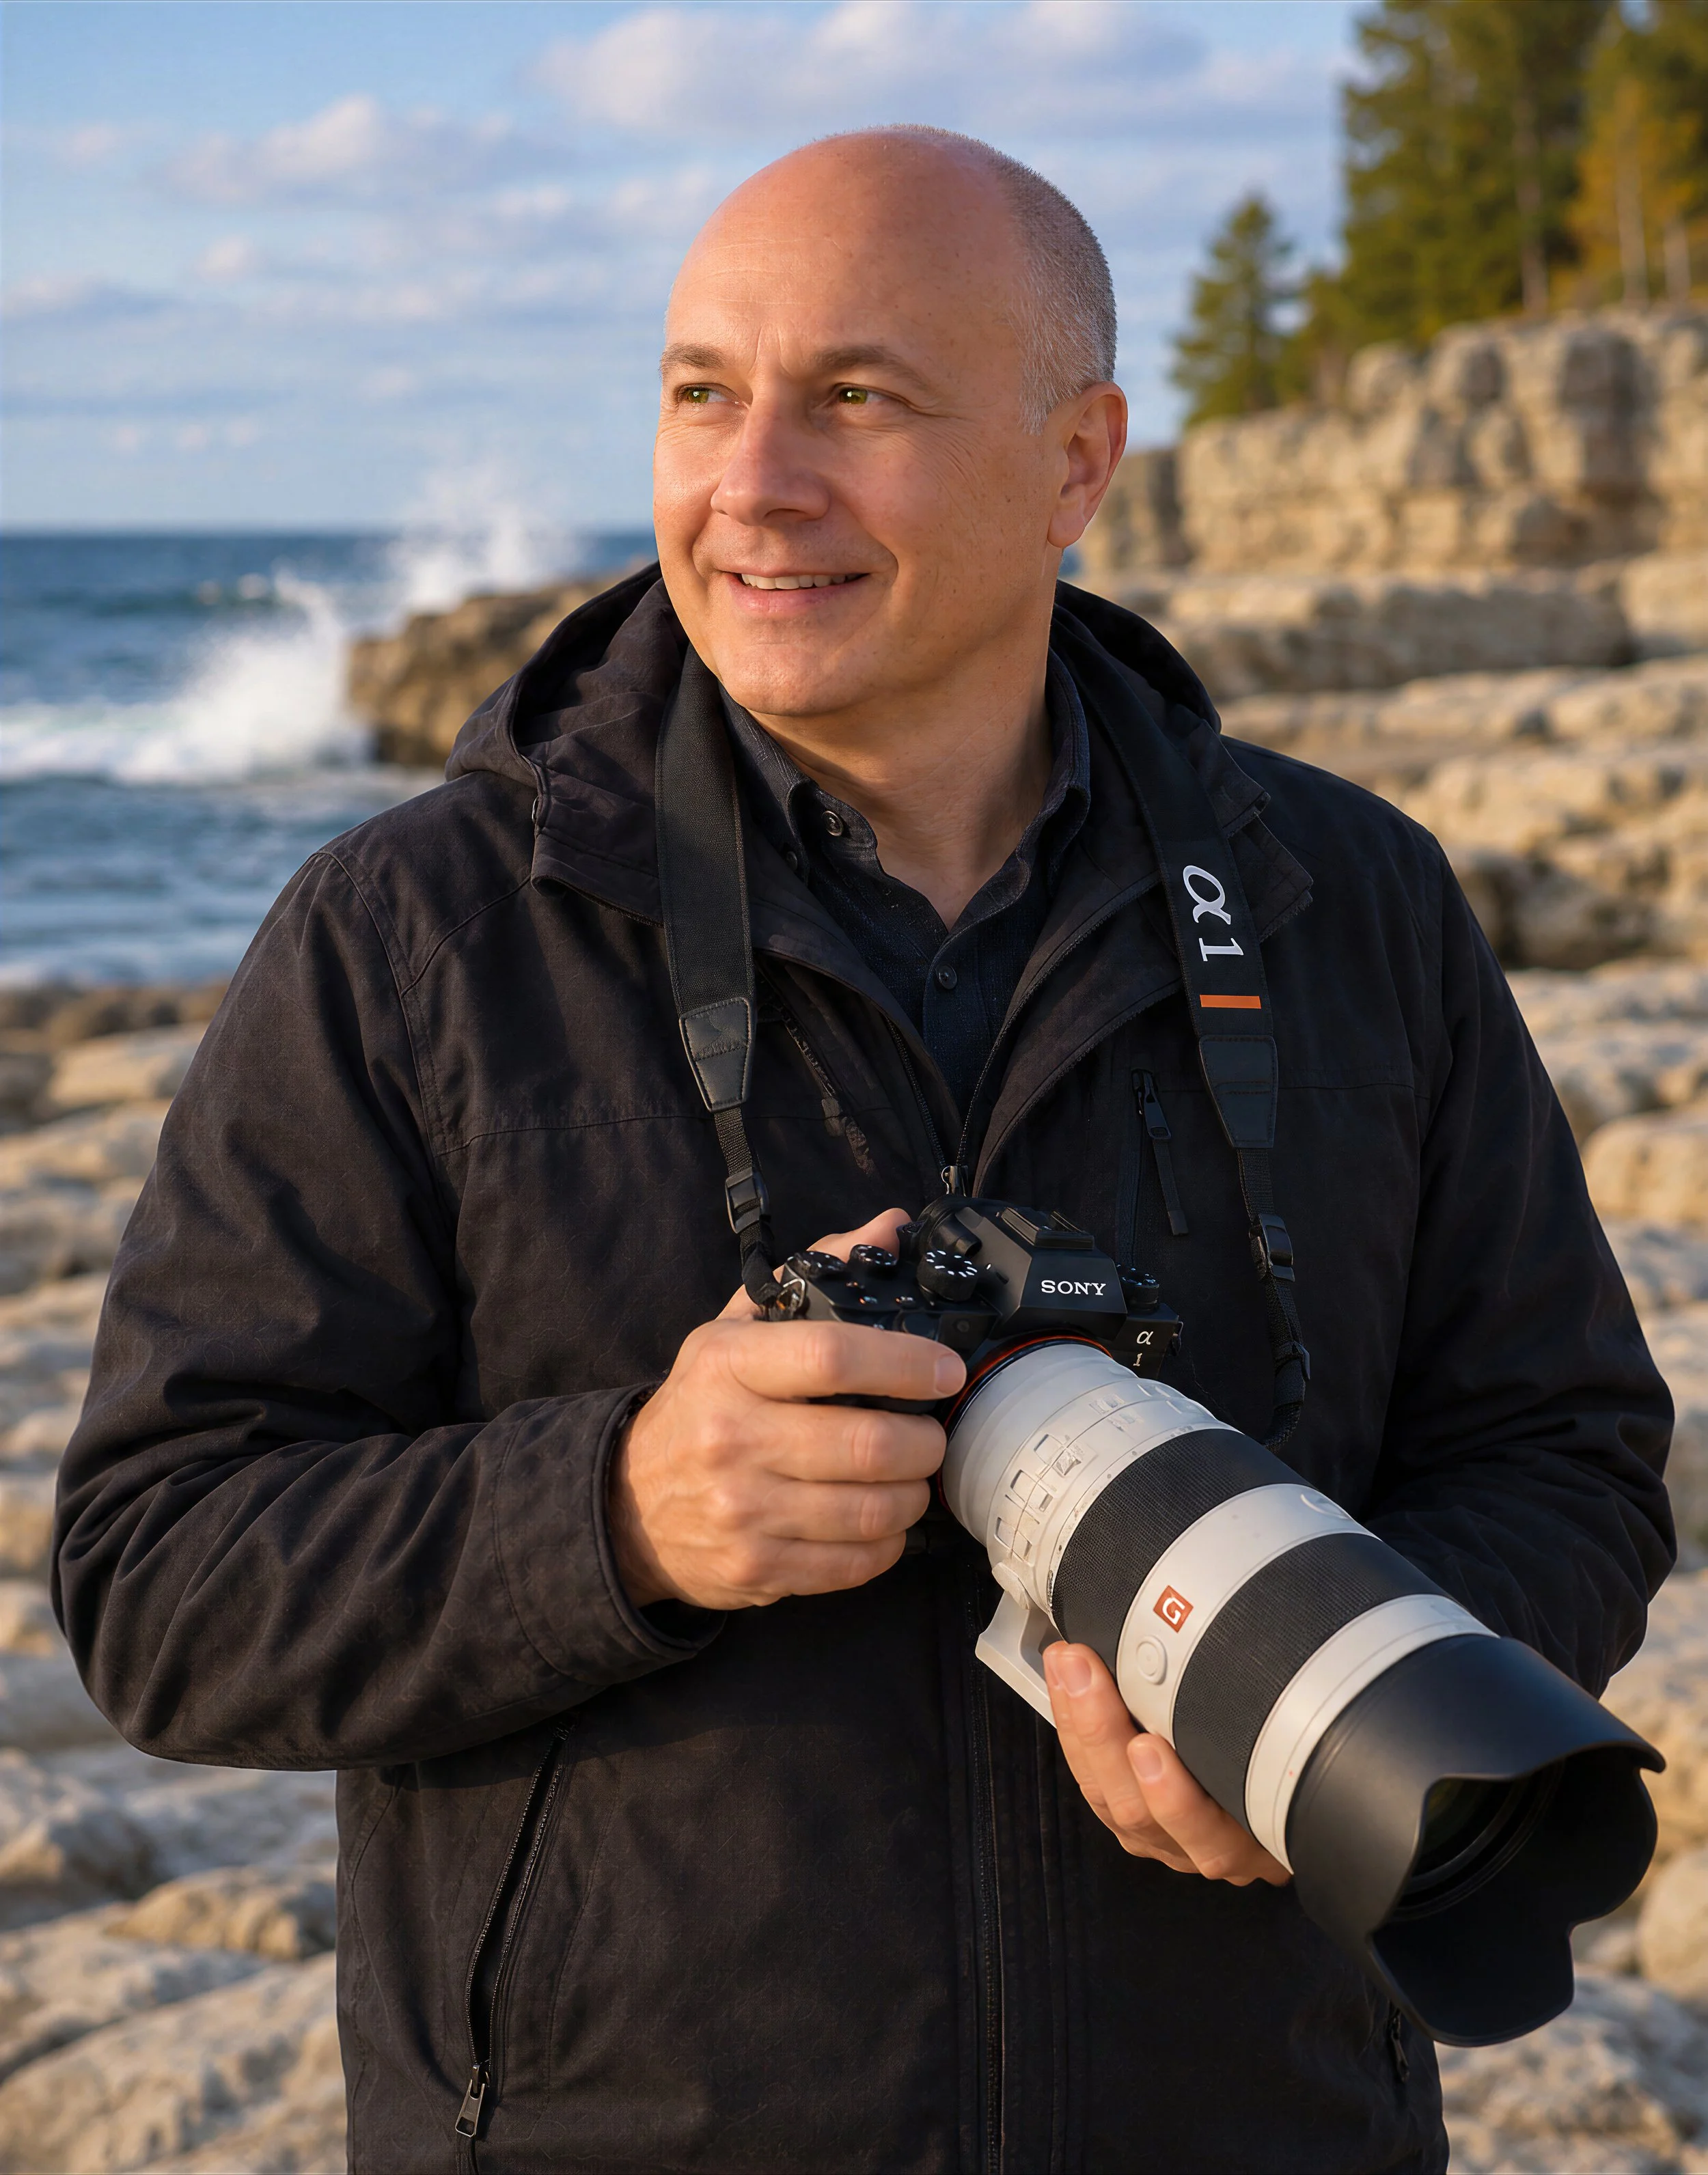
The Photographer Behind the Camera
Cameras will continue to become faster. Autofocus will become smarter. Editing software will become more sophisticated. And the equipment in my camera bag will undoubtedly continue to evolve.
But I don't expect the fundamental challenge of photography to change very much.
Sometimes making a photograph means researching where a subject is likely to appear and then quietly waiting.
Sometimes it means knowing a skating routine well enough to be standing in the right place before an important element begins.
Sometimes it means responding instantly to stage lighting I don't control.
And sometimes it means slowing everything down, placing the camera on a tripod and allowing an exposure to continue for 30 seconds.
The equipment matters.
But the equipment isn't the photograph.
My goal is to combine the tools, preparation, technique and experience behind the camera to create something worthwhile in front of it:
a moment worth remembering.